

Files and upgrades
TR-069 is also used to manage the CPE’s firmware, allowing service providers to remotely upgrade their devices without the involvement of customer or extra engineer. The Download RPC mechanism to directly upload files is shown below.
NOTE: GenieACS is required to be installed. The router should be configured and connected to Splynx. More information how to do this you can find in the next tutorials:
Let's consider the step-by-step instruction how to update RouterOS and tr069-client package on the Mikrotik device.
| Warning: |
|---|
| Before performing the update/upgrade in production, it's strongly recommended to try to update/upgrade your locally tested device and make sure that CWMP communication is resumed with a new version and required ROS functionality works. Then, repeat steps by updating groups of CPEs incrementally. Do not update all remote devices at once |
STEP 1
Under Files you can upload some update files or configuration files for a devices.
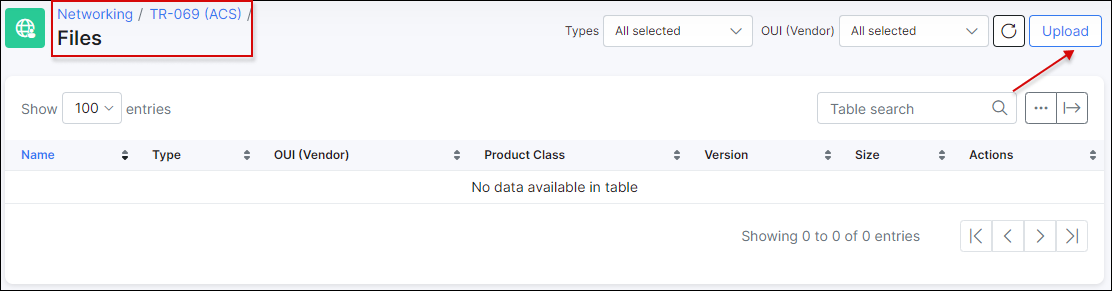
To add a new file, click on Upload button:
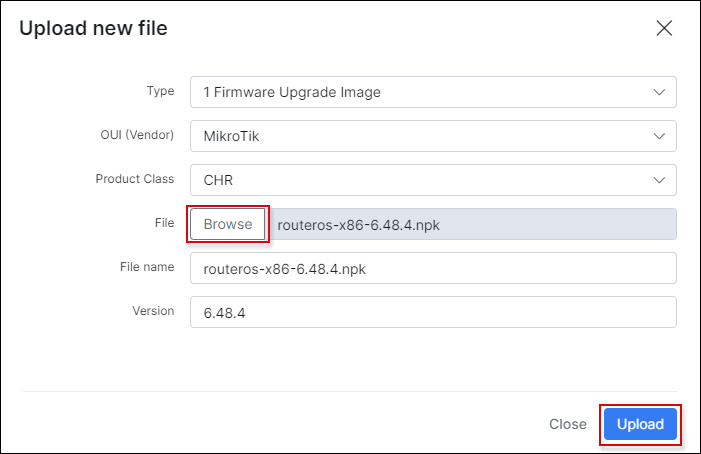
The next fields are presented here:
-
Type -
FileTypevalues of Remote procedure calls which are defined by CPE WAN Management Protocol (CWMP) standard and indicate the purpose of the file download;-
1 Firmware Upgrade Image - used to update of firmware. MikroTik's update is package based, that's why it is required to use XML file to describe firmware upgrade/downgrade files. Such XML file supports providing multiple URLs of files, which will be downloaded and applied. CPE will download XML, parse/validate its contents, download files from provided URLs and try to upgrade;
-
2 Web Content - is intended to be used for downloading files that contain only web content for a CPE’s web-based user interface;
-
3 Vendor Configuration File - used to perform complete configuration overwrite (as intended by standard) or configuration alteration (when URL's filename extension is ".alter");
-
4 Tone File - the tone data object used to voice service function of a CPE specified in TR-104. It defines the contents of the tones and announcements generated locally by the VoIP device;
-
5 Ringer File - the ringer data object used to voice service function of a CPE specified in TR-104. It defines the ring sequences generated by the VoIP device;
-
X Mikrotik Factory Configuration File - used to change of the RouterOS default configuration script that is executed when
/system reset-configurationcommand is executed (or the other means when router configuration is being reset);
-
-
OUI (Vendor) - an organizationally unique identifier of the device manufacturer;
-
Product Class - identifier of the class of product for which the serial number applies. That is, for a given manufacturer, this parameter is used to identify the product or class of product over which the SerialNumber parameter is unique;
-
File - used to choose the file, e.g.
routeros-x86-6.48.4.npkto upload; -
File name - name of the file as it is written to the CPE’s memory, it will be extracted from the downloaded file itself;
-
Version - used to indicate the version of the uploaded file.
We are going to update Mikrotik CHR RouterOS and tr069-client package from v6.48 to v6.48.4, so the files routeros-x86-6.48.4.npk and tr069-client-6.48.4.npk were downloaded from https://mikrotik.com/download site on our local computer.
STEP 2
| NOTE: |
|---|
| It is recommended to use HTTPS in production for firmware management. HTTP should only be used when testing initial setup in the secured/private network because Man-in-the-middle attacker could read/change configuration parameters. |
It's required to create XML file with this content:
<upgrade version="1" type="links">
   <config/>
   <links>
       <link>
          <url>https://splynx_domain:7567/routeros-x86-6.48.4.npk</url>
       </link>
       <link>
          <url>https://splynx_domain:7567/tr069-client-6.48.4.npk</url>
       </link>
   </links>
</upgrade>
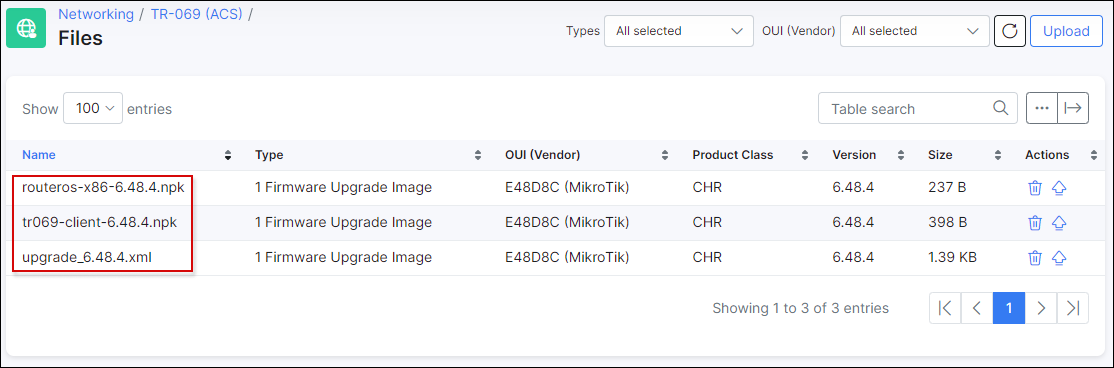
After that upload 3 files using Upload button in Networking → TR-069 (ACS) → Files menu of Splynx.
STEP 3
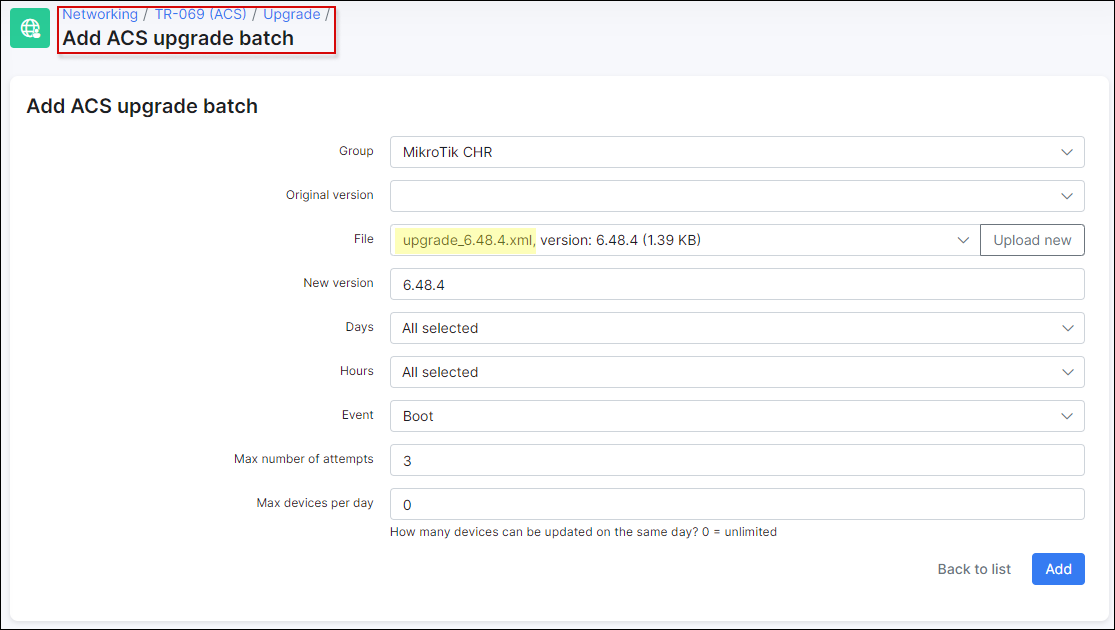
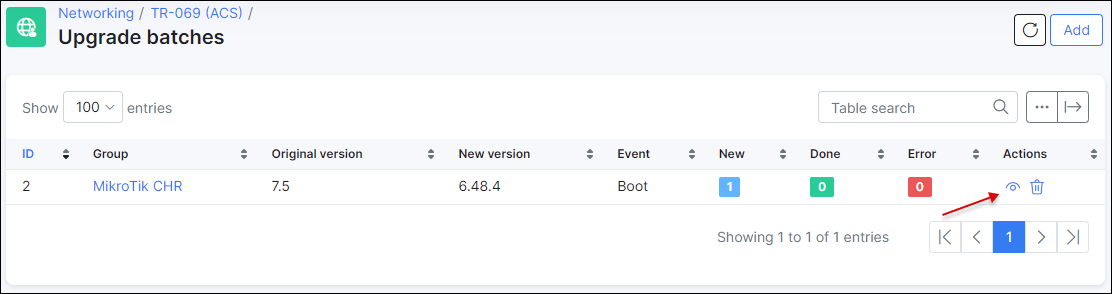
Once files have been uploaded, you can use them to update/upgrade a device in Networking → TR-069 (ACS) → Upgrades menu. The next step is to add ACS upgrade batch item.
The next fields are available here:
-
Group - the ACS group created in
Config → Networking → TR-069 (ACS) → Groups (section); -
Original version - the current version of package (-s) on the device (-s);
-
File - the file that will be uploaded to the device. The files are filtered by the selected
group. The optionUpload newhelps to upload new file toNetworking → TR-069 (ACS) → Filesin case it wasn't done on the previous step; -
New version - the version to which device will be updated/upgraded;
-
Days - the days where update/upgrade will be performed;
-
Hours - the hours where update/upgrade will be performed;
-
Event - on which event (
BootorInform) the update/upgrade has to be triggered; -
Max number of attempts - number of attempts to update the device;
-
Max devices per day - defines how many devices can be updated on the same day. By default:
0value = unlimited.
Select previously uploaded upgrade_6.48.4.xml file in the File field and other parameters as shown on the screenshot above. Double check the Devices for upgrade list.
After ACS upgrade batch is added, we can view its info, edit the parameters or remove it. Below we can see devices which are due to be updated/upgraded or have already been updated/upgraded. The devices are detected by selected group and version.
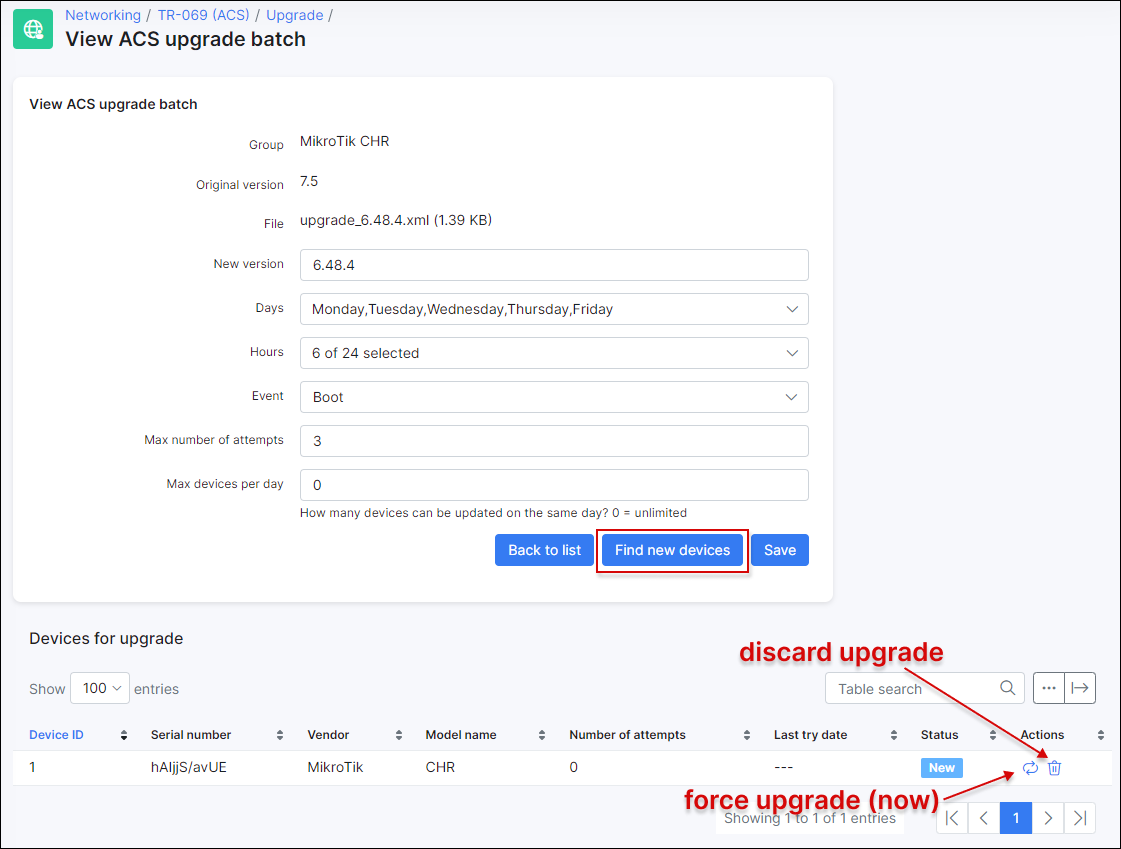
The other options available here:
-
Find new devices - helps to find new devices which are not listed but match the current batch parameters and add such devices to the update/upgrade queue;
-
Force upgrade (now) - the forced run of update/upgrade on specific device;
-
Discard upgrade - to remove device from update/upgrade queue.
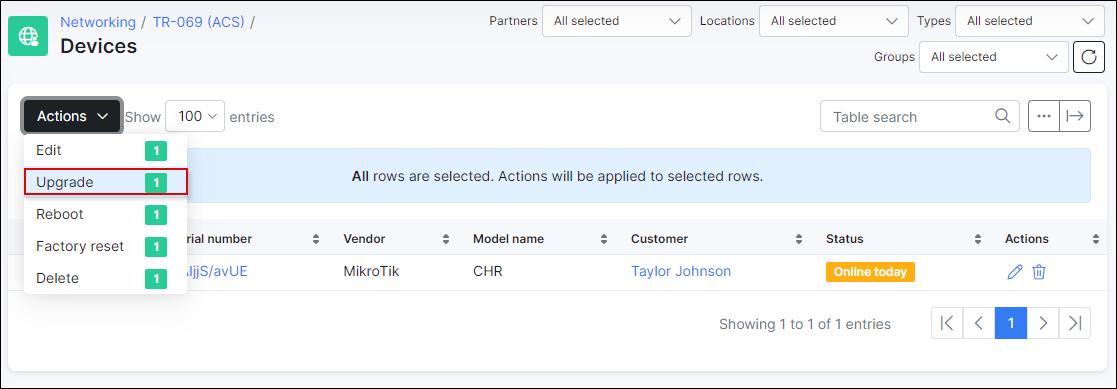
Moreover, you can use Upgrade action from mass Actions drop-down list in Networking → TR-069 (ACS) → Devices to upload selected files on particular devices.
STEP 4
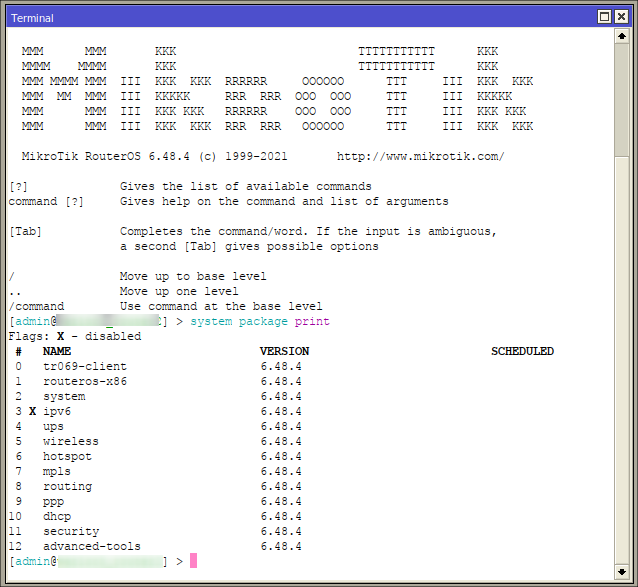
Finally, reboot the necessary device using Winbox or directly via GenieACS interface. After that, wait 1 minute and reconnect to device, double check its RouterOS/package version.
The device status can be monitored in Networking → TR-069 (ACS) → Upgrade → View ACS upgrade batch as well. After 30 minutes Splynx checks if the version on the device is up to date and only then the status will be changed to Ready or to Error in case the version has not been changed.

If something doesn't work, you can try to find the solution in Troubleshooting section or contact our support team via ticket.