

Invoices
An invoice is a commercial document lists the goods or services you have supplied to your customer and what they owe you in return. It includes the cost of the products purchased or services rendered to the customer, the names of the seller and customer, description and price of goods or services and the terms of payment.
The invoices are considered as the tax documents if your business is registered for VAT (value added tax), you are not allowed to simply remove an invoice from sales records. It is required to issue invoices in line with specific regulatory requirements and to keep copies to show what revenue you earned and any tax you might have collected on the sale. The invoice can be annulled with a Credit note if issued incorrectly.
Splynx provides the ability to work with or without invoices:
-
without issuing invoices, Splynx just receives payments and charges customers each invoice period without creating an official document.
-
when invoicing is required, Splynx is able to generate invoices automatically or an administrator can issue invoices manually.
The invoices can be created for all required customers in Splynx or for an individual one. The invoices in PDF format are fully customisable with templates.
All documents generated by Splynx can be exported in different formats (PDF, CSV, Excel) for printing or sending to the end-users.
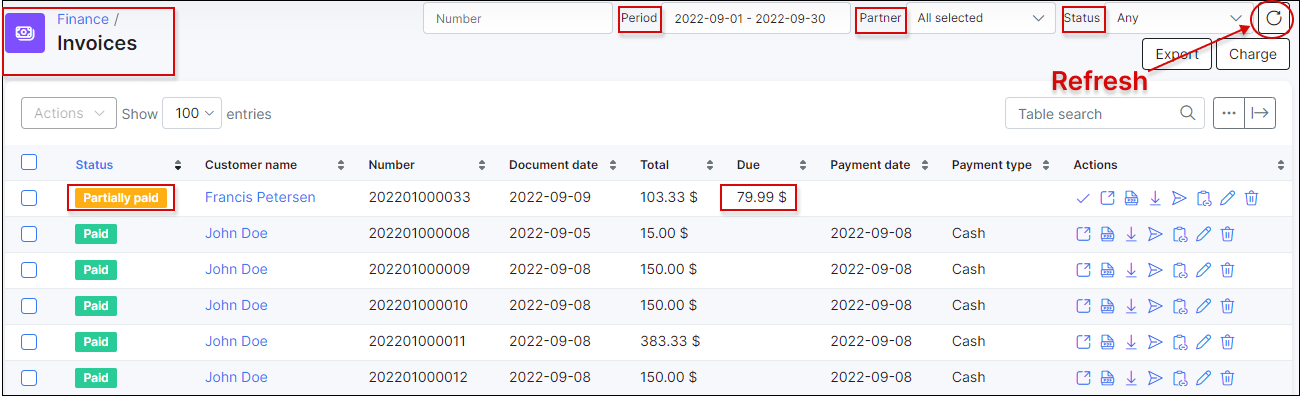
All issued Invoices can be found in Finance → Invoices.
With the use of a filter, it is possible to display invoices by Period of time, Partner or Status (Any, Paid, Unpaid, Pending, Deleted, Overdue).
Beneath the list/table of invoices you'll find the table Totals that displays a total of all invoices by their status, the number of invoices in each status and the total amount of money in each status of invoices.
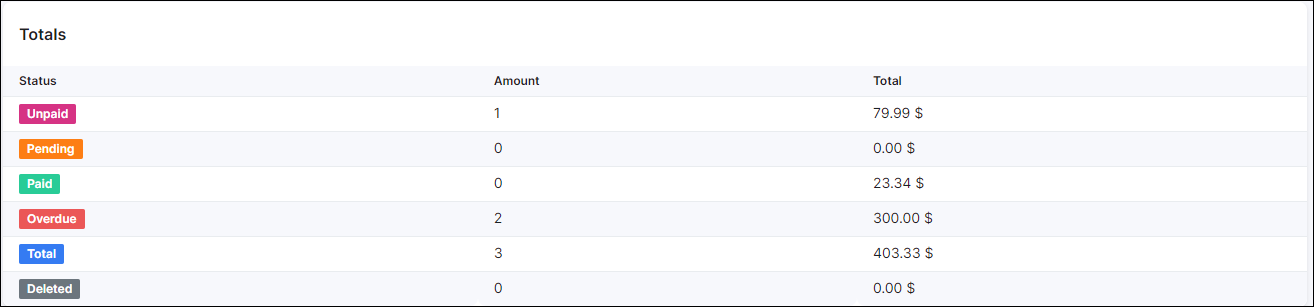

- The statistics of
Partially paidinvoices will be included in theUnpaidcategory of the Totals table inFinance → Invoices.
To export the list of invoices for accounting purposes, open Finance → Invoices and click on Export button.

In the export window, you can choose the period of time and the export type/format (PDF, CSV, external handler, etc.).

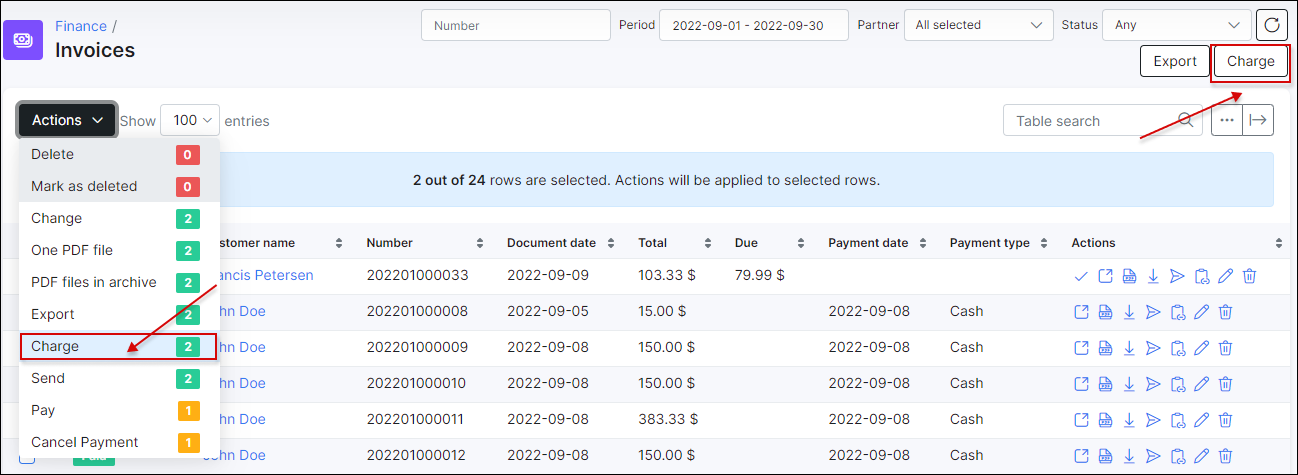
Alternatively, once you have selected the required invoices, you can export them using one of the following actions One PDF file, PDF files in archiveor Export in the mass Actions drop down menu.
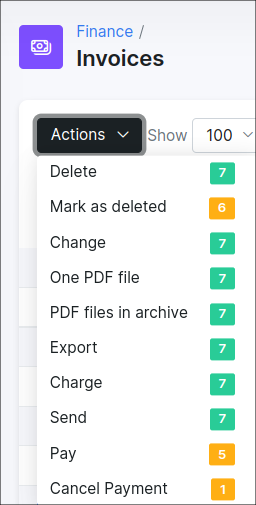
If one of the payment add-ons is configured for customers in Splynx, you can manually charge the invoices all at once using the Charge button at the top right corner of the table or you can use the same named option in the mass Actions drop down menu by selecting the required invoices before.

-
Using the Charge button at the top-right corner of the page, the charge operation will be applied to all invoices according to the selected period in the panel, including invoices with the
OverdueandPendingstatuses; -
Using the Charge option in mass Actions menu, the charge operation will be applied only to selected invoices in the list.
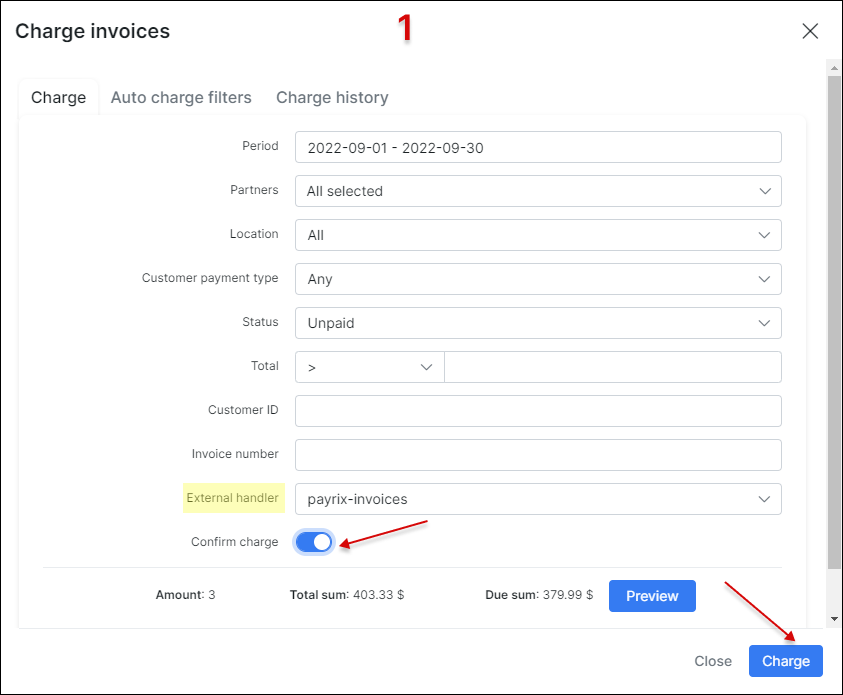
In new window specify the necessary options for invoice charge:
-
Period - the time period when the invoices were created;
-
Partners - the service provider to which the customer is assigned to;
-
Location - the customer location;
-
Customer payment type - the method that is used by customer to make payments;
-
Status - the status of invoice, by default is used
Unpaid; -
Total - the total sum of the invoice, the amount can be specified by
=(equal to),<(less than) and>(greater than) sings; -
Customer ID - the customer id within the Splynx;
-
Invoice number - the number of invoice in Splynx, usually the format
{year}{partner_id|2}{next|6}is used by default, it can be changed inConfig → Finance → Settings; -
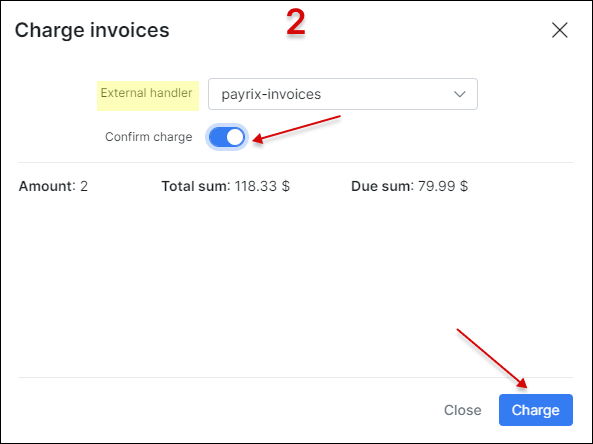
External handler - requires one of the payment add-ons in Splynx to be installed, as a result this determines which handler we can choose here;
-
External handler parameters (depends on a specific handler) - the additional parameters that may vary depending on the selected handler. For example with
paymentexpresshandler we can setchunk sizeparameter in order to split generated CSV file (used only for PxPay processing interface in Payment Express); Withnetcash_dohandler we can setaction dateparameter to specify the date of affected transaction (-s), etc. ; -
Confirm charge - the toggle allows to confirm the charge;
-
Amount - the quantity of invoices to be issued for charge;
-
Total sum - the total final price at which customers are invoiced;
-
Due sum - the actual price that is charged because some invoices have been partially paid;
-
Preview - the button helps to check the invoices information before performing the charge.
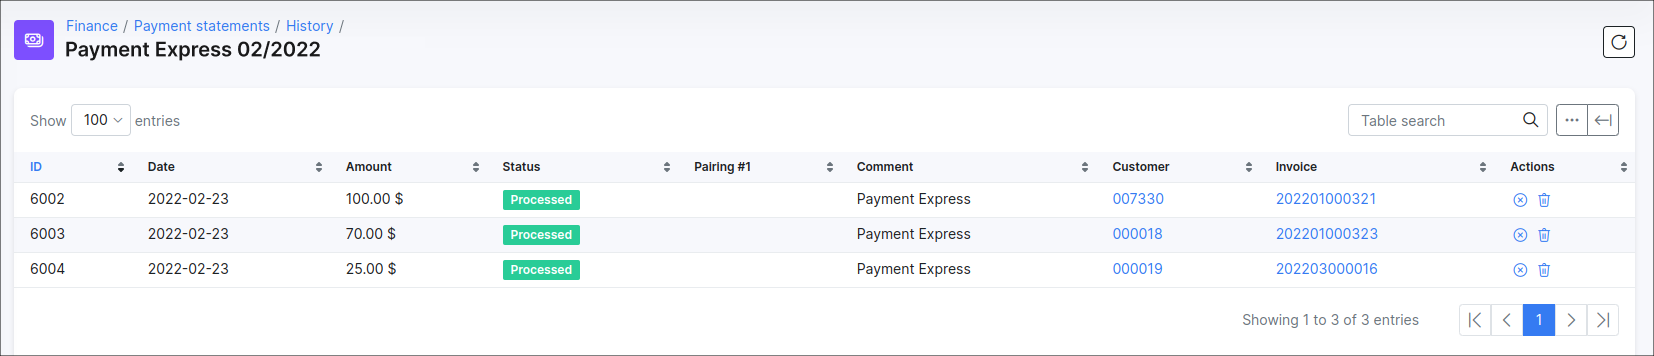
Once charged successfully, payment statements and batch files will be created and sent to payment add-on side and the issued invoices will be in Pending state. It will take some time for payments or bounced payments to be received. Then the status of the invoices will be changed to Paid.
To download the charge result files click on the 
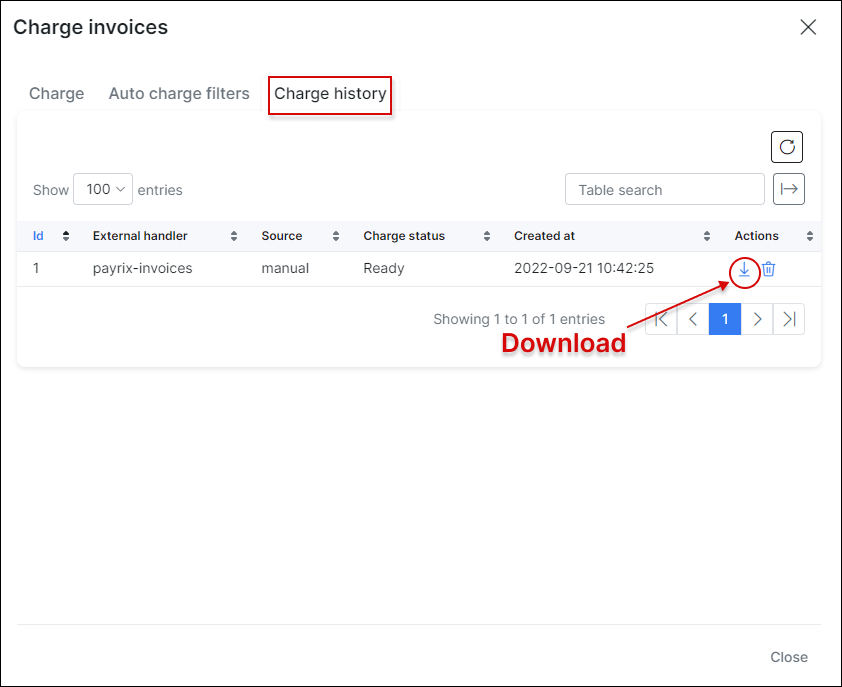
Splynx checks for any payments and allocates them to the correct invoice. As a result, the invoices will become Paid or Unpaid. You can check the status of the payment statements for the charge invoices in Finance → Payment Statements → History

The invoice charging process can be automated using the Auto charge filter.
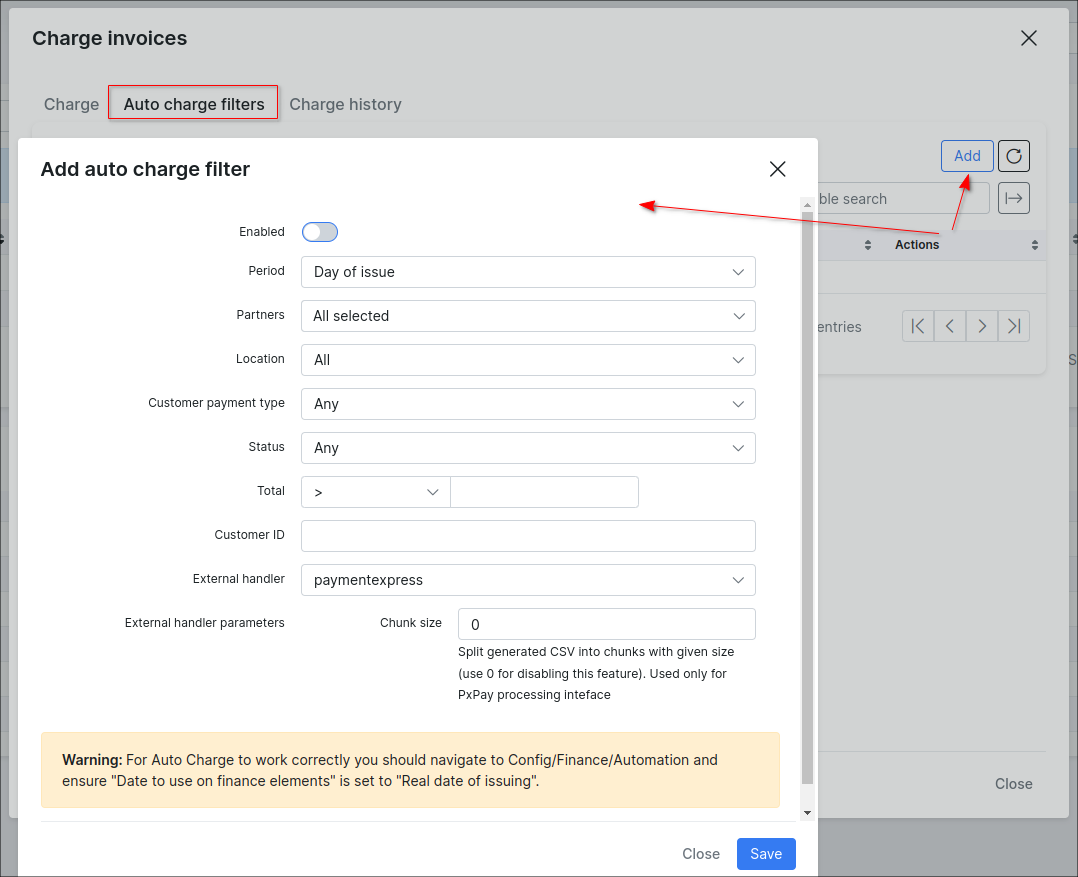
Open Finance → Invoices, click on the Charge button and navigate to the AUTO CHARGE FILTERS tab. Then press the Add button.

- Auto charge filter doesn't require any confirmation from the administrator, so use it with caution.
- To make Auto Charge work properly you should navigate to
Config → Finance → Automationand ensure that the value in theDate to use on finance elementsfield is set toReal date of issuing.

→ Explanation
Why we cannot use the Billing date value in the Date to use on finance elements field for Auto charge filter?
Let's say that we have the default settings in Config → Finance → Automation:
Confirmation period (days) = 3;
Date to use on finance elements = Billing date;
And Billing day = 1 for the customers in Splynx (the option is located in Config → Finance → Settings)
Consequently, the invoices will be auto-generated and will be visible for customers on the 4th day of the next month, but the date creation of such invoices is the 1st day of the month. The Auto Charge filter won't find the invoices on 1st day of the month because they are not visible to customers. When the 4th day arrives, the Auto filter will not charge the invoices because its creation date is the 1st day of the month.
In new window specify the necessary options for auto charge filter:
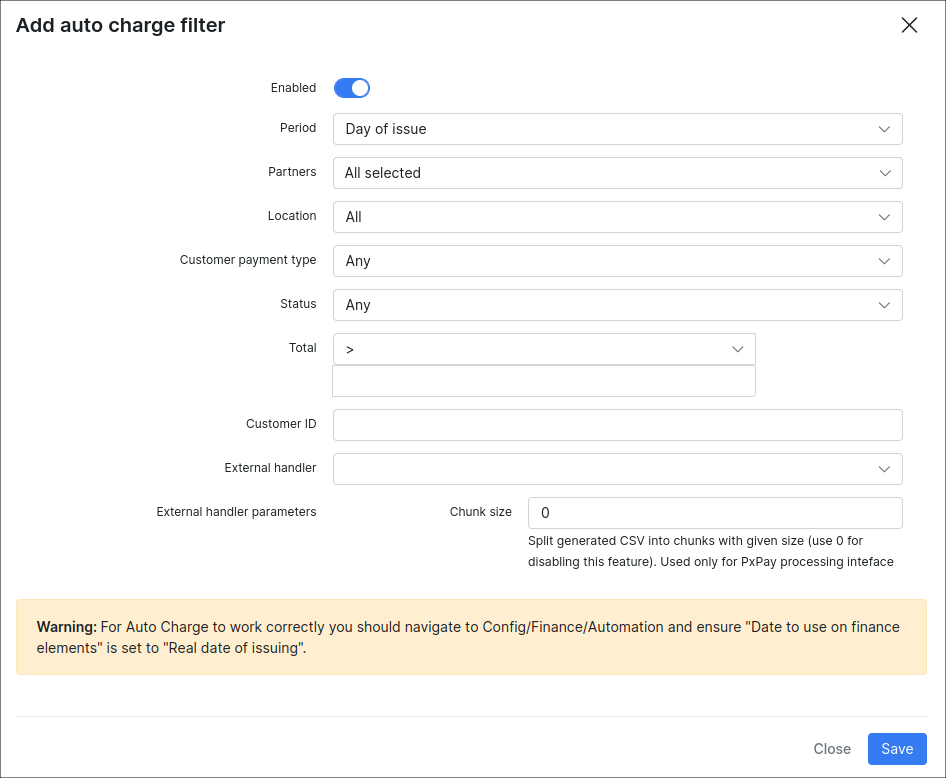
-
Enabled - the toggle to enable/disable the filter;
-
Period - date when the filter starts;
- Day of issue - the same day when the invoice is created;
- Day after issue - the day after the invoice is created;
- Day before due date -the day before the invoice is created;
- On due date - the amount of days after the billing day the customer has to make payments before getting blocked (usually it's 15th day of the month);
- +N days after issue - X days after the invoice was created, the number can be specified in new field Days after issue;
-
Partners - the service provider to which the filter is applied to;
-
Location - the customer location to which the filter is applied to;
-
Customer payment type - the customer's method to make payments;
-
Status - the status of the invoice to which the filter applies;
-
Total - the total sum of the invoice to which the filter applies, the amount can be specified by
=(equal to),<(less than) and>(greater than) sings; -
Customer ID - the customer id within the Splynx;
-
External handler - requires one of the payment add-ons in Splynx to be installed, as a result this determines which handler we can choose here. External handler parameters can be specified as well for some add-ons;
Then, press Save button. To edit the created filter click on 
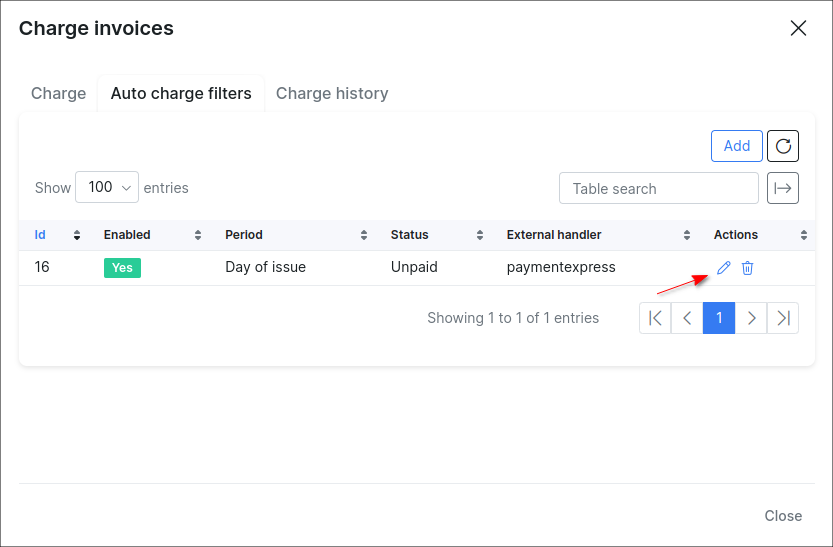
-
The filter will be triggered on the selected day in Period field at 11:59 PM;
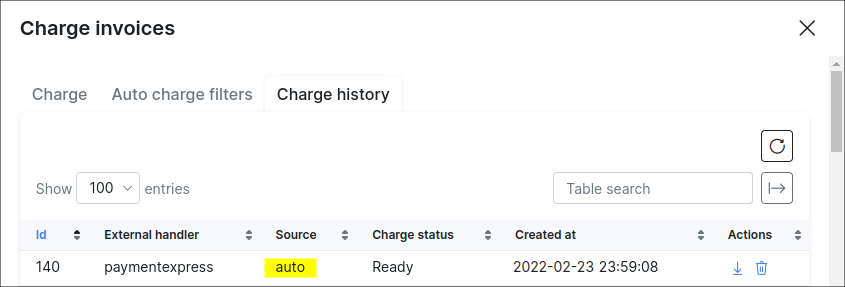
-
The result of the charge execution can be checked under the Charge history tab, the value in the Source column should be
auto.
Suggested to read: Customer billing.