Maps
Splynx supports using three different map engines withing the system: Open Street, Google and Bing maps. To configure Maps in Splynx, navigate to Config → Main → Maps. The maps are used to help you to find out where your customers, leads, routers and other objects are located.

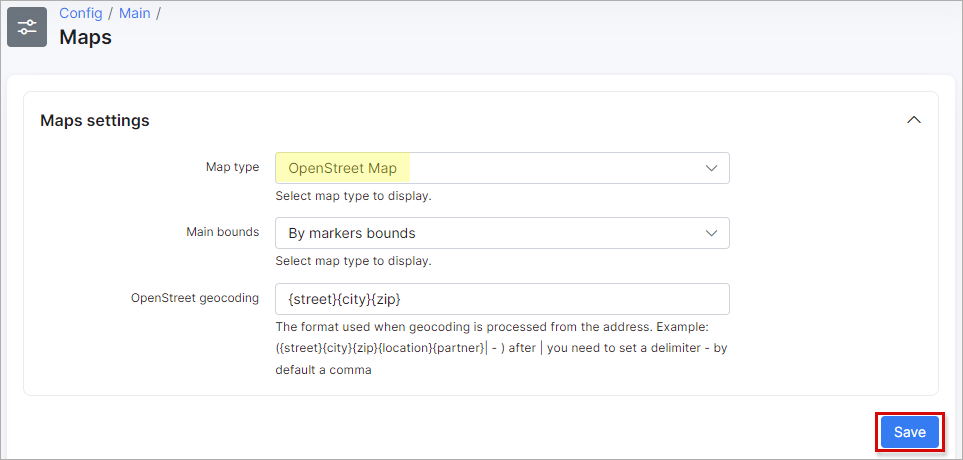
By default, Splynx system uses Open Street map type.
Choosing Open Street type we can set up the following settings:
-
Main bounds - the options are By markers bounds (e.g. the map that starts in Auckland, New Zealand and is restricted to New Zealand. The user can pan away from Auckland and explore other New Zealand cities, but the user cannot pan or zoom to beyond the constraints set on the map.), By country (restricted to specific country only) and By custom area (it's possible to choose the necessary area on the map manually).
-
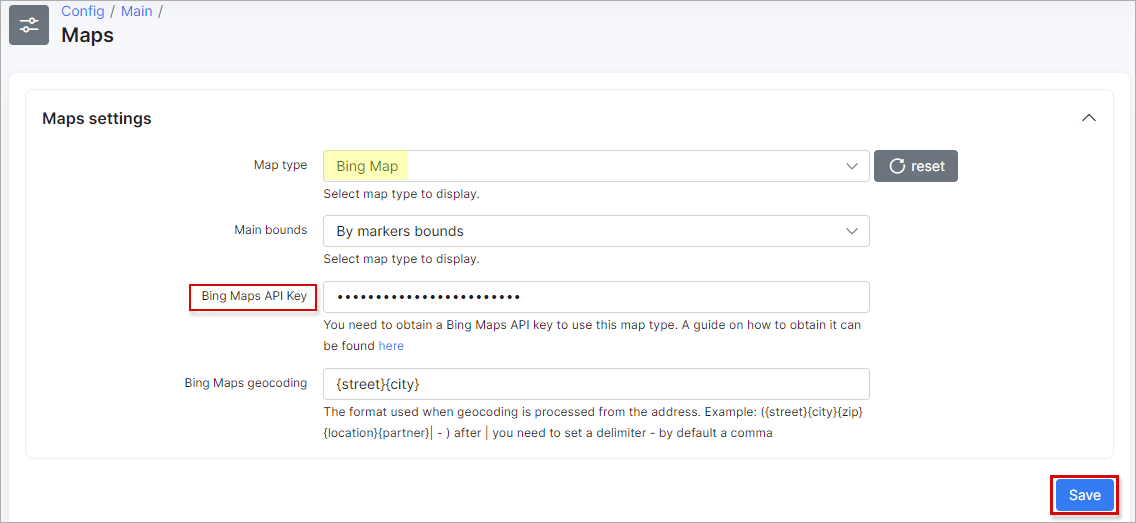
OpenStreet geocoding - the format that is used when geocoding is processed from the address, e.g.
{street}{city}{zip}{location}{partner}|- after|you need to set a delimiter - by default it's a comma.
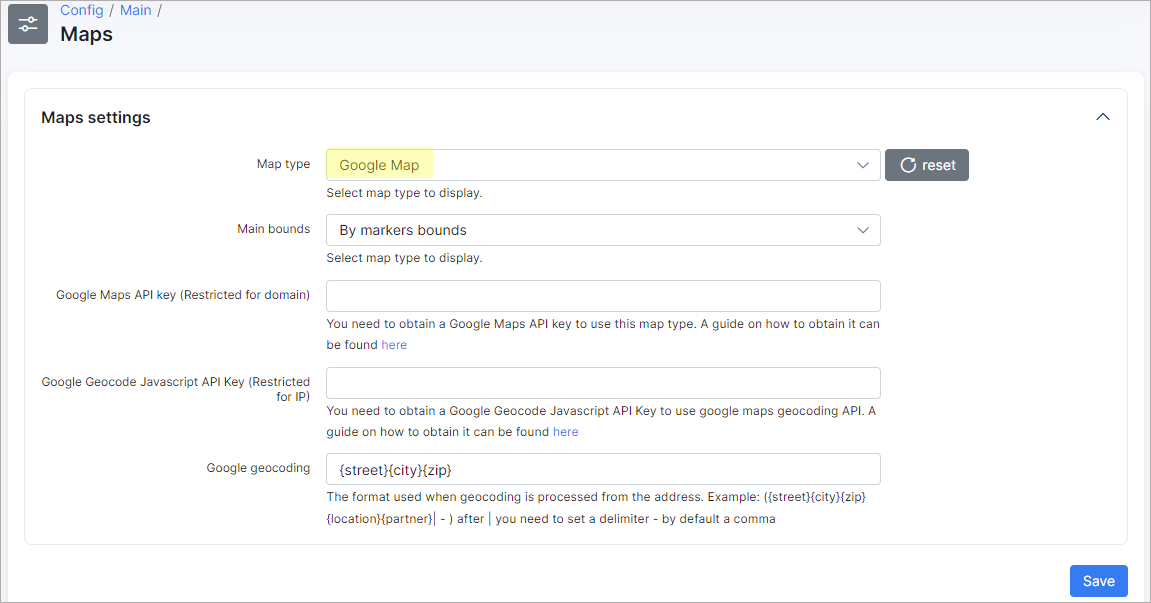
As for Google Map type, it's required to obtain the Google Maps API keys.
How to get the Google Maps API keys
IMPORTANT:
-
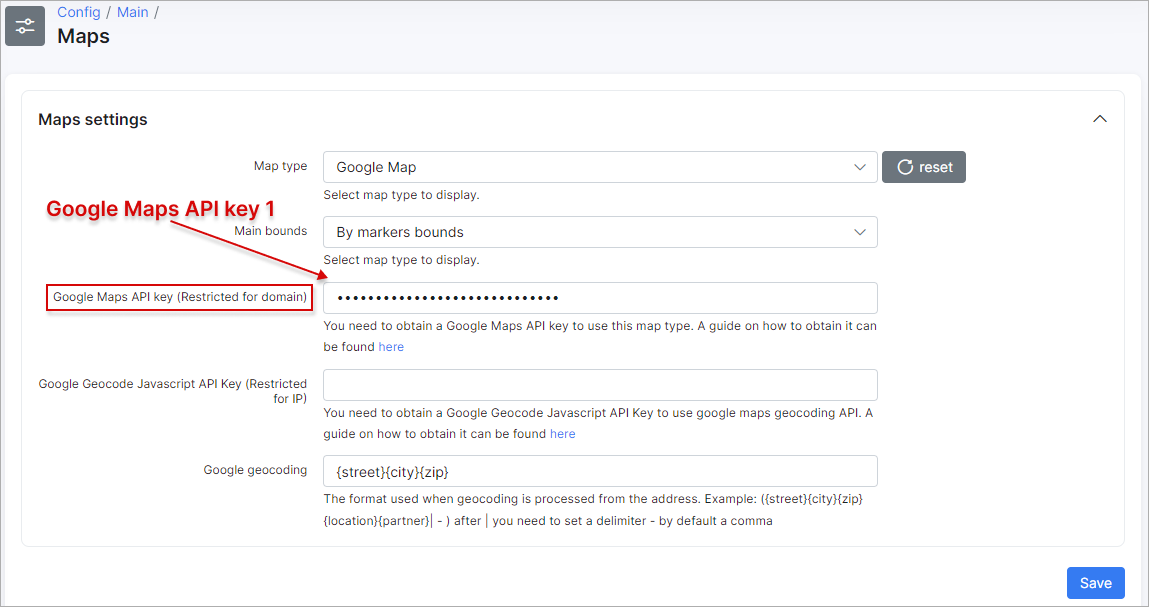
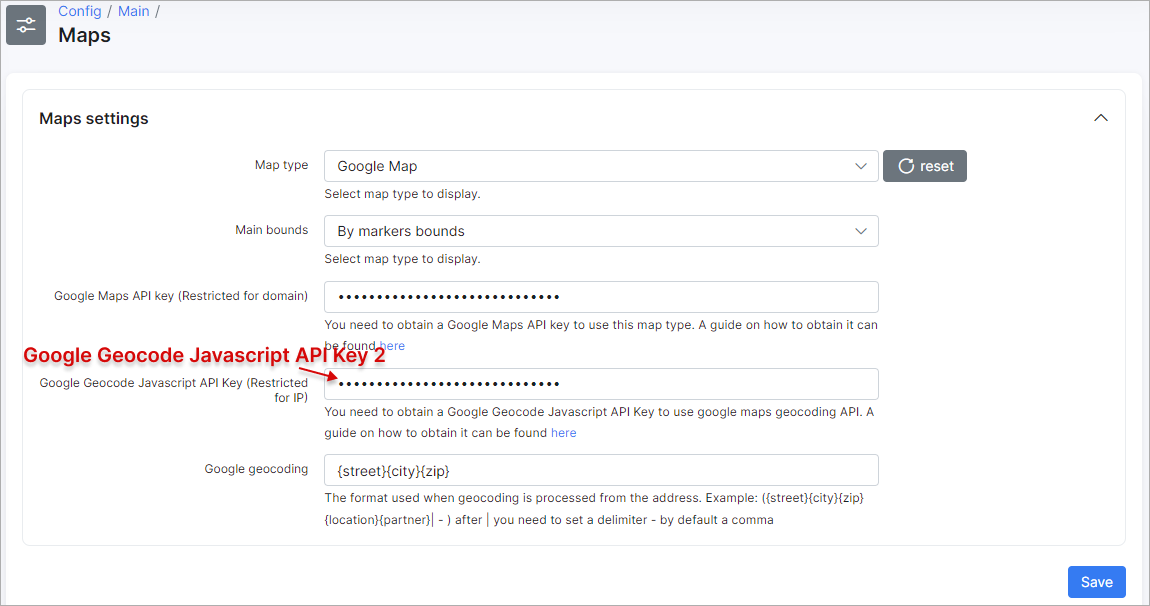
Google Maps API key (Restricted for domain) - ensures the operation of the map appearance in Splynx. The Maps Embed API is free to use, you can use this API without enabling billing.
-
Google Geocode Javascript API Key (Restricted for IP) - provides the search according to the entered address, e.g. in customer's profile. To use this key it's required to enable billing for your Cloud project. Your account will not be charged if you stay within your free quota;
-
After you enable billing, there is no limit to the amount that you might be charged. To gain more control over your costs, you can create a budget and set alerts. More information you can find in the Billing documentation and in the FAQ.
Video: How do I set up billing for my project
Google Cloud offers a $300 free trial, and Google Maps Platform features a recurring $200 monthly credit. More information can be found at the following links:
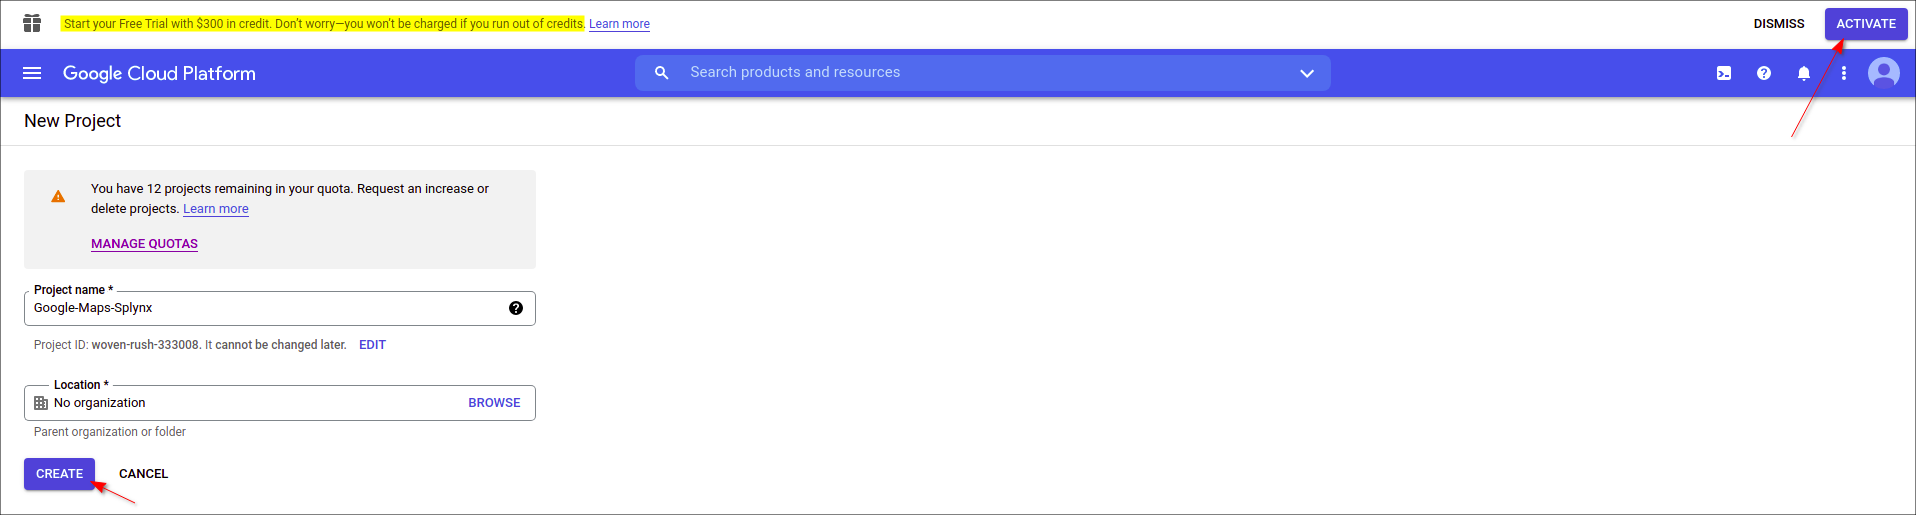
Step #1: Set up the project
Before you start using the Google Maps Platform APIs you need to set up your Google Cloud project in order to manage your API keys.
-
Create a new Google Cloud project in the Cloud Platform;
-
On the New Project page, fill in the required information, such as Project name, Project ID (accept the default or click EDIT to enter a customized ID), Location (select your own or choose No organization);
-
Click Create button.
More information can be found here.
Step #2: Enable APIs
To use Google Maps Platform, you must enable the APIs you plan to use with your project. If you are not sure which APIs to enable, try using the API Picker or documentation - link 1 and link 2.
Navigate to Google Maps Platform page and enable the next APIs:
Click here to view the APIs you have enabled. If the button says ENABLE, click the button to enable the API, it it says MANAGE, the API is already enabled and you don't need to do anything further.
Step #3: Get an API keys
The API key is a unique identifier that authenticates requests associated with your project.
To create the Google Maps API key (Restricted for domain):
-
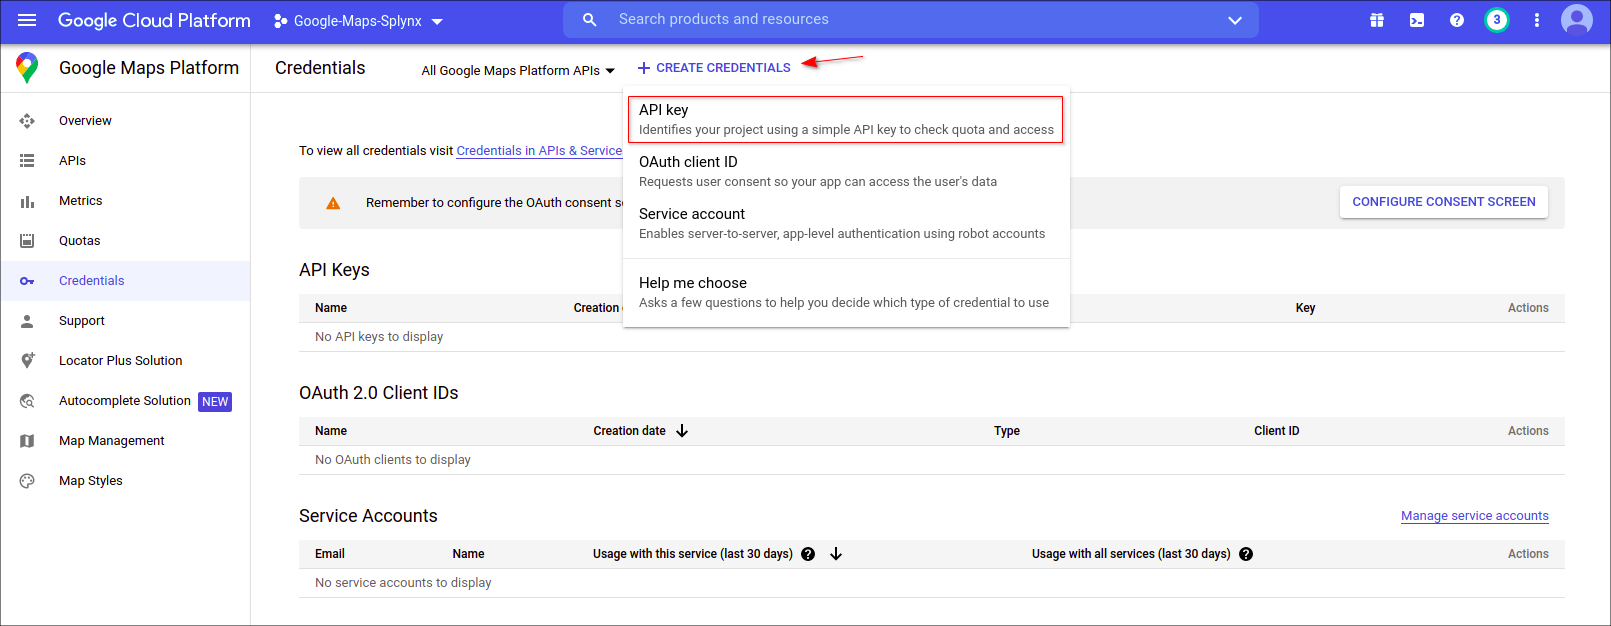
Go to the Google Maps Platform > Credentials page;
-
On the Credentials page, click Create credentials > API key;
-
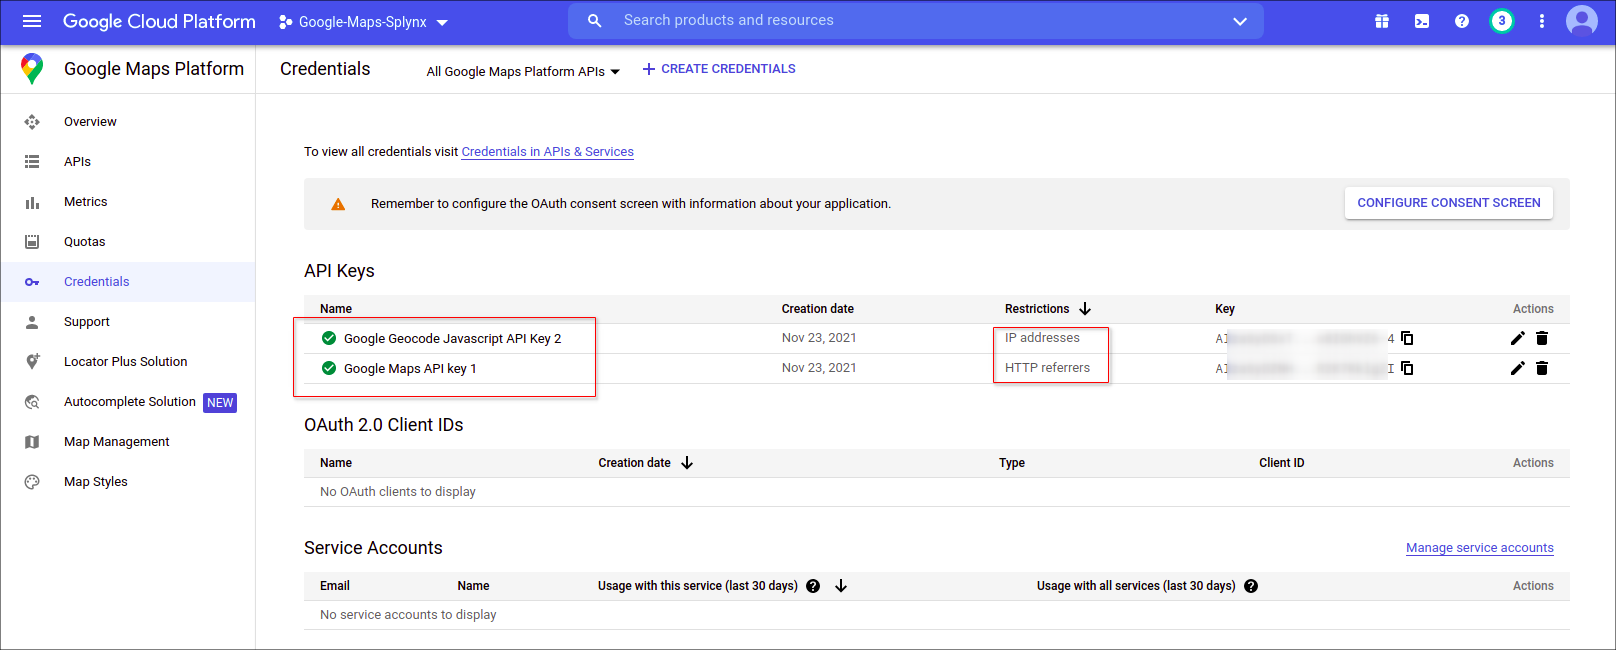
Click Close. The new API key is listed on the Credentials page under API keys;
-
Click on Edit API key, on new page change the Name, set Application restrictions to
HTTP referrers (web sites)and in Website restrictions section add your Splynx domain address.
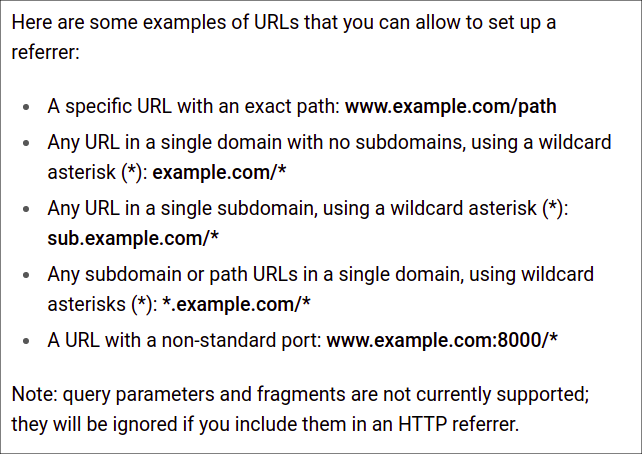
Examples of adding the HTTP restrictions

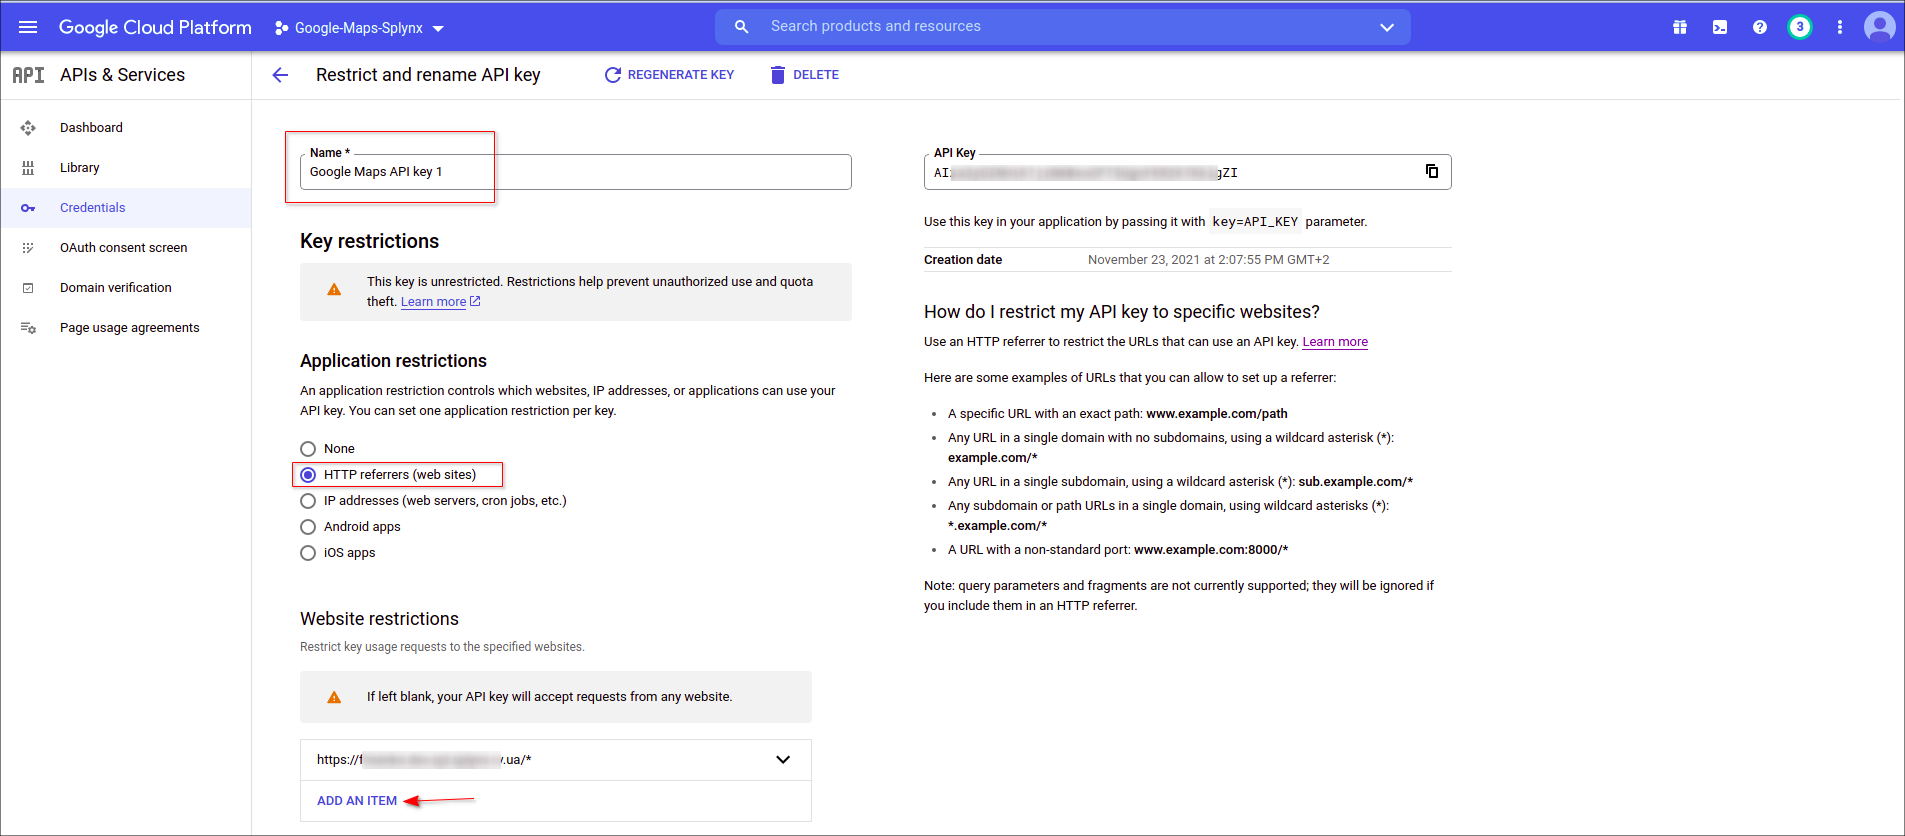
Click Save at the bottom of the page;
- Copy and paste your Google Maps API key 1 to the corresponding field in Splynx.
To create the Google Geocode Javascript API Key (Restricted for IP):
-
Go to the Google Maps Platform > Credentials page;
-
On the Credentials page, click Create credentials > API key;
-
Click Close. The new API key is listed on the Credentials page under API keys;
-
Click on Edit API key, on new page change the Name, set Application restrictions to
IP addresses (web servers, cron jobs, etc.)and in Website restrictions section add your Splynx public IP address;
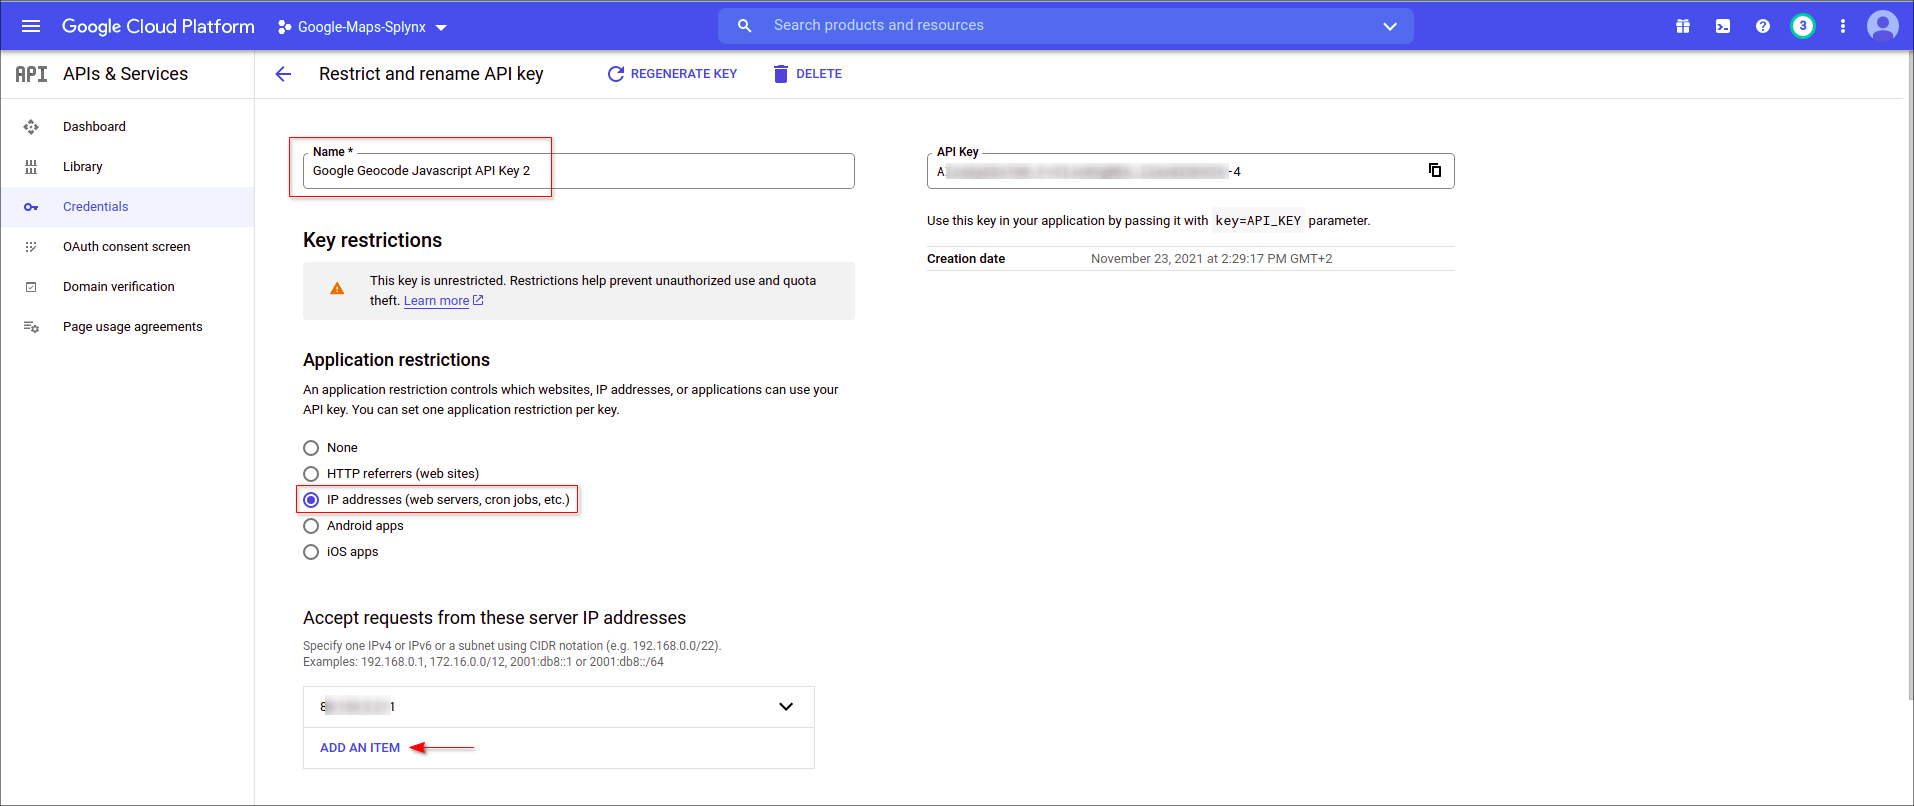
Click Save at the bottom of the page;
- Copy and paste your Google Geocode Javascript API Key 2 to the corresponding field in Splynx and press Save.
Video: How to generate and restrict API keys
To shutdown the project use this link.
To view your map navigate to Customers → Maps.
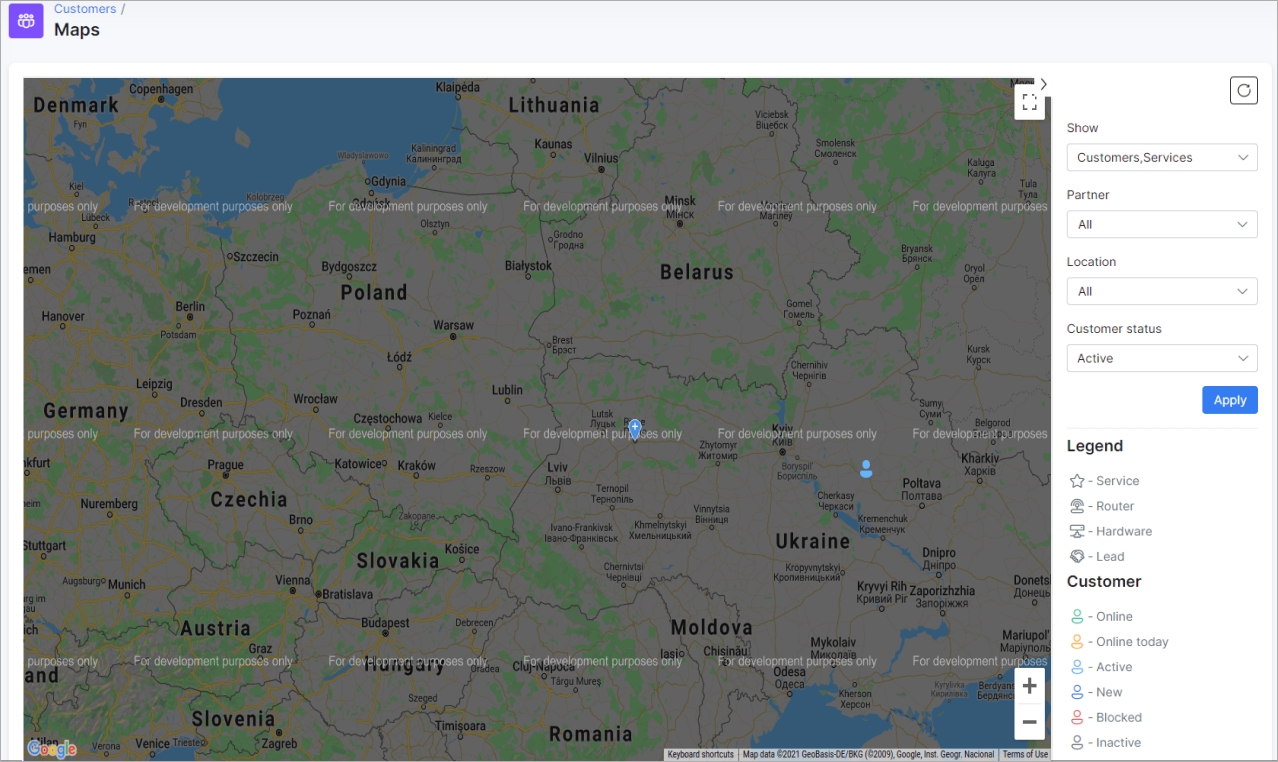
The watermark For development purposes only on the map means that billing wasn't enabled for the current project. You have to associate a credit card so that you can get billed if your site has requests that exceed the $200 credit they give you monthly for free.
You can also apply filters to the map to display only the items you want to view. The customer pointers have different colors, this depends on the customer status (new, active, online, blocked, inactive). On the map, you can click on any pointer to see additional information.
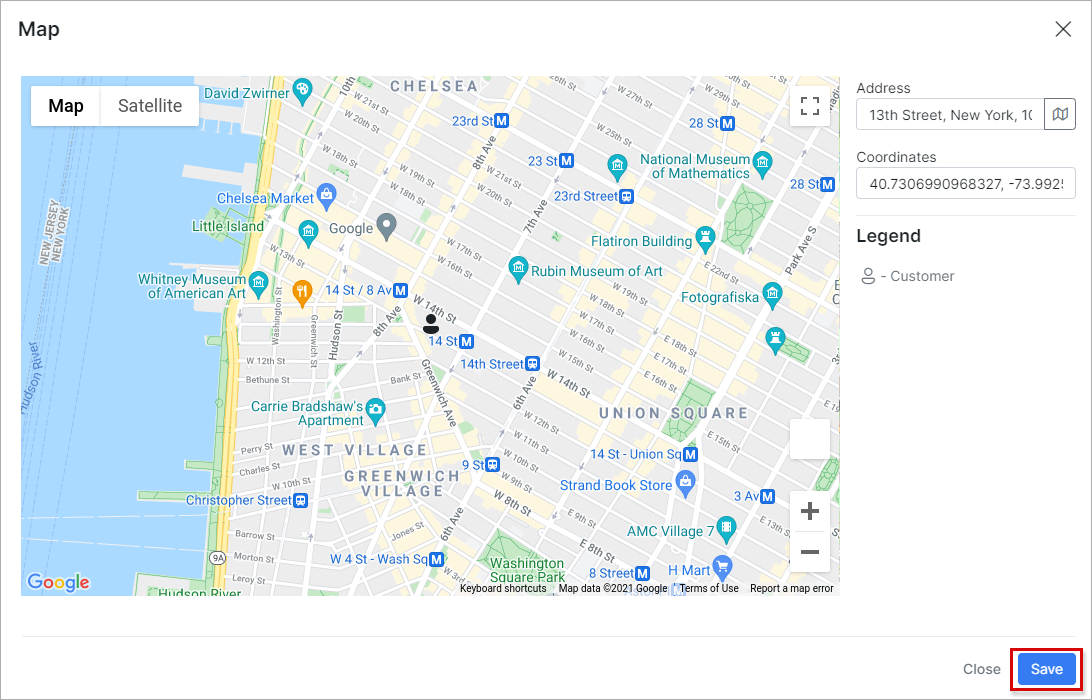
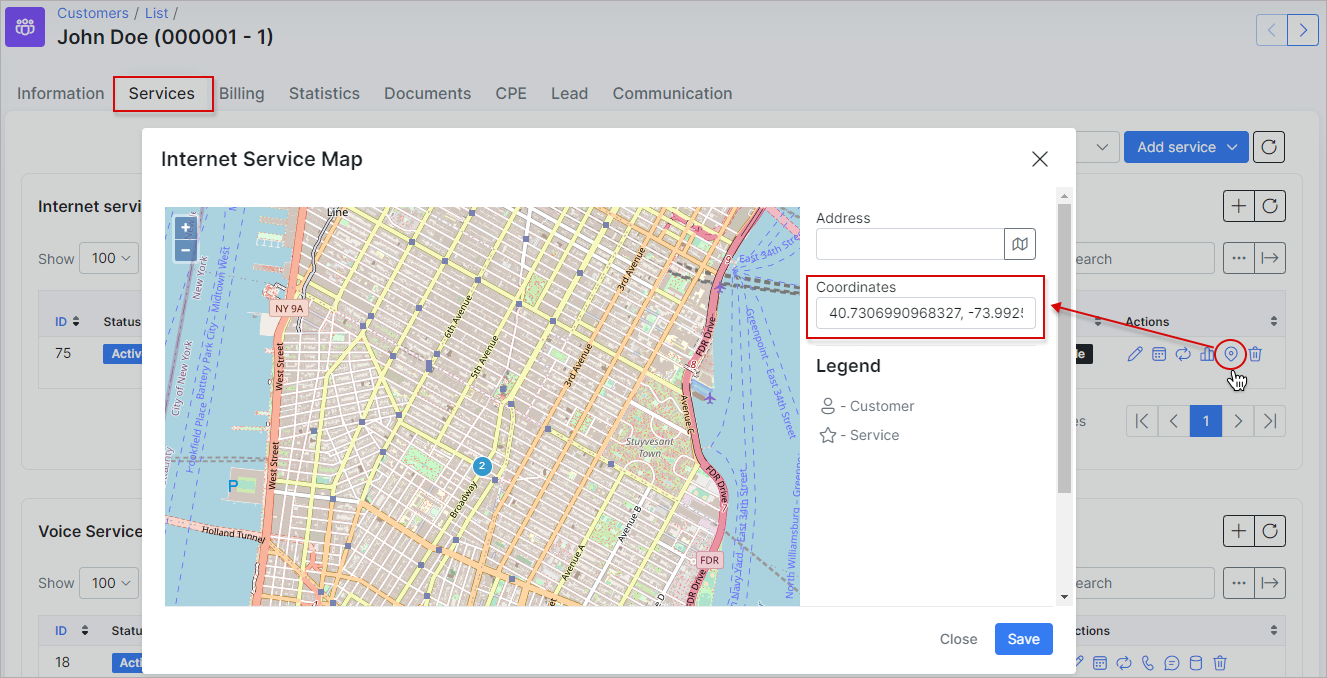
To edit customer GPS coordinates, navigate to customer profile, Information tab, find the Geo data field, click on the  icon, in a new window, fill in the field Address and press the icon again to find the GPS coordinates.
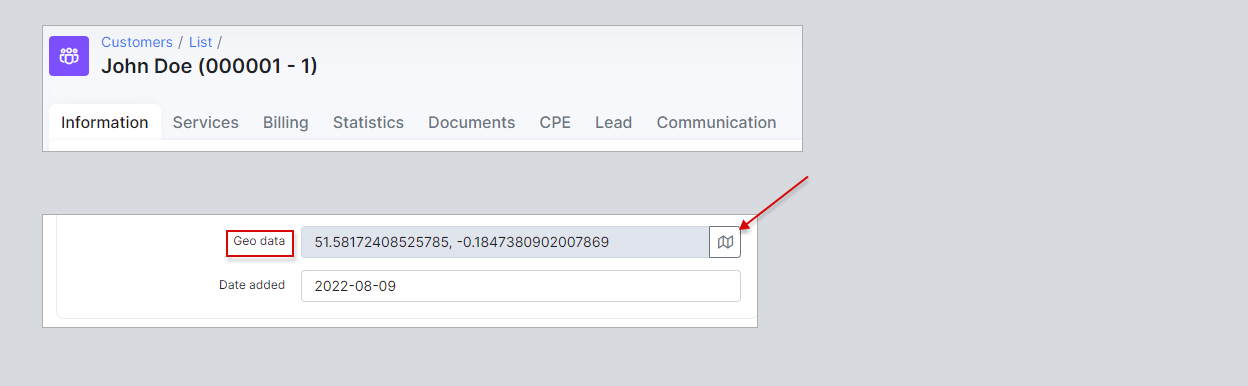
If the customer has the saved address (Street, ZIP code, City), the GPS coordinates will be found automatically. Also, you can click on the map to add a pointer manually or drag and drop the pointer to move it as well. After editing the pointer location press Save button.
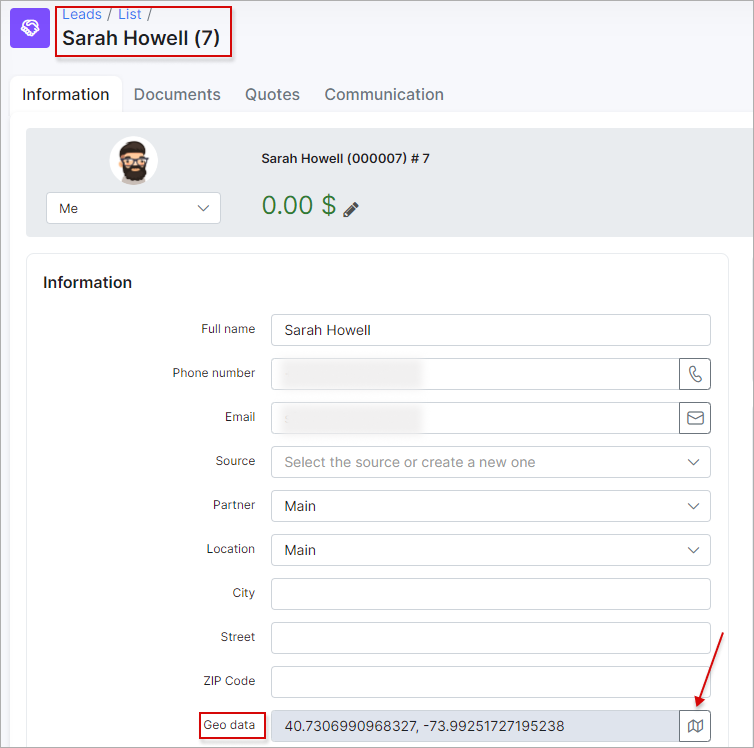
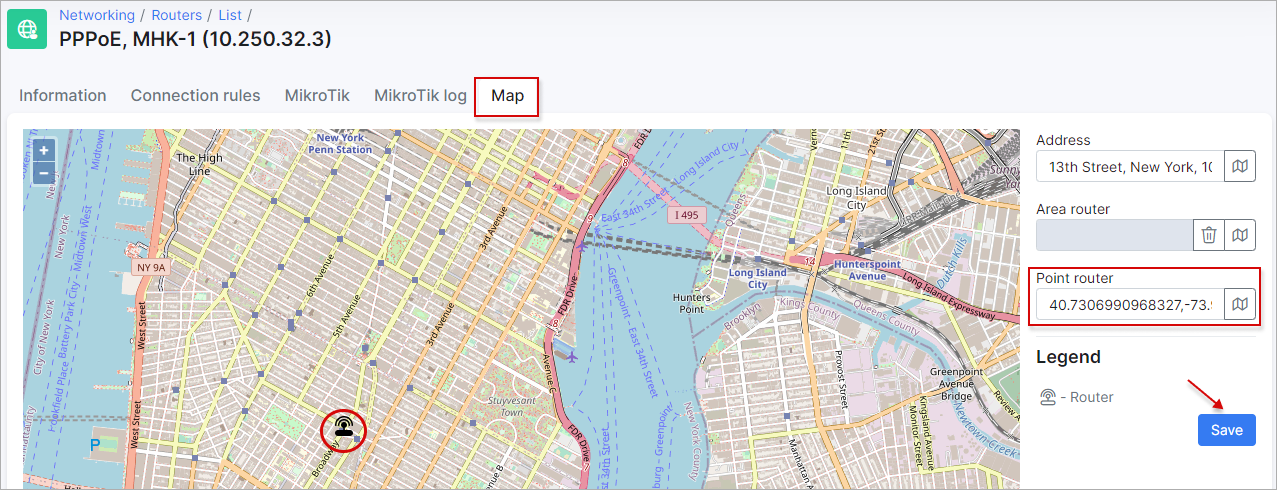
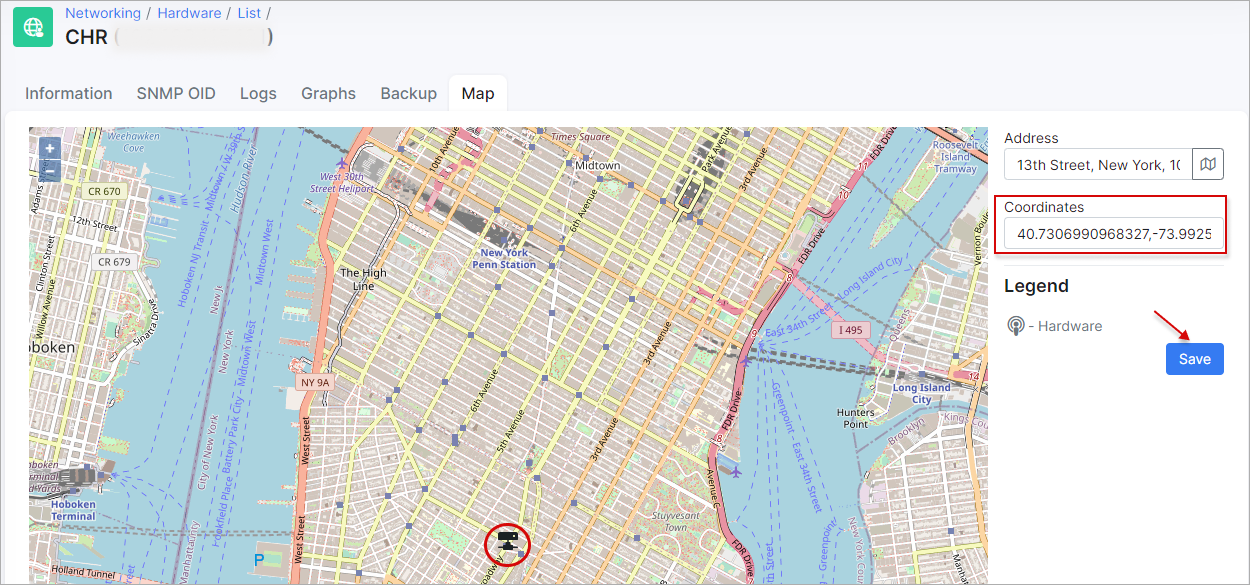
You can set the GPS coordinates to the leads, routers, services and other hardware in the same way:
For Bing Map type, it's required to create a Bing Maps API key to use this map.