

3CX add-on
3CX is the add-on module designed for the integration your Splynx with 3CX service via the server-side CRM integration engine and its own API. 3CX add-on simplifies the calls management in Splynx, as a result, we have a complete call history in relation to the specific customer, it's possible to listen, download the recorded files, add the comment to the call, to link/unlink call to the ticket etc.


Installation
To install the add-on use one of the two methods: via CLI on the Splynx server or via the Splynx Web UI.
To install the add-on via CLI, the following commands can be used:
apt-get update
apt-get install splynx-3cx
To install the add-on from the Web UI:
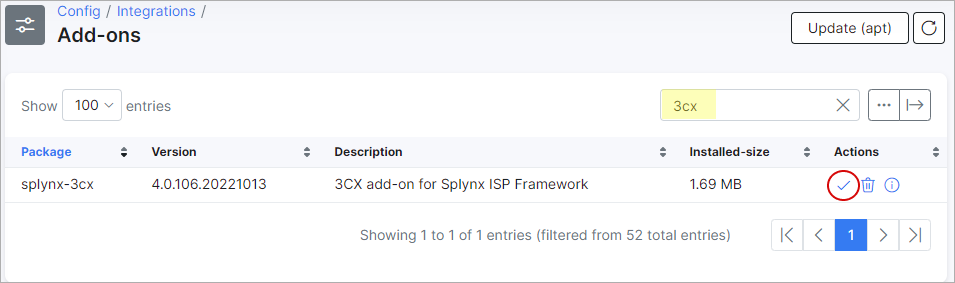
Navigate to Config → Integrations → Add-ons:

Find there the splynx-3cx add-on and click on the install icon in the Actions column of the table:
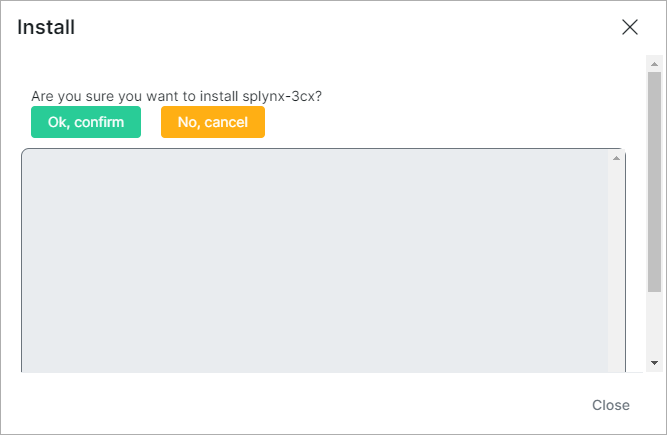
Then, click on the OK, confirm button to begin the installation process:
Once the installation process has completed, all configurations for the add-on can be found in Config → Integrations → Modules list, simply click on the necessary icon of the splynx_3cx_addon module and you will be able to change settings of the add-on:

In the add-on configuration you can set the absolute path to the record's folder, by default it's /var/lib/3cxpbx/Instance1/Data/Recordings/.
3CX Module Overview
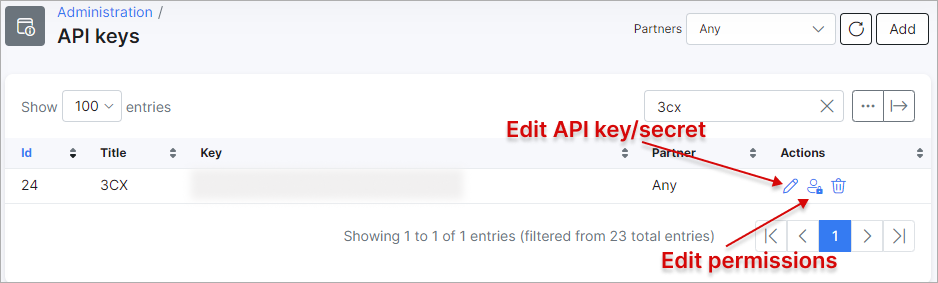
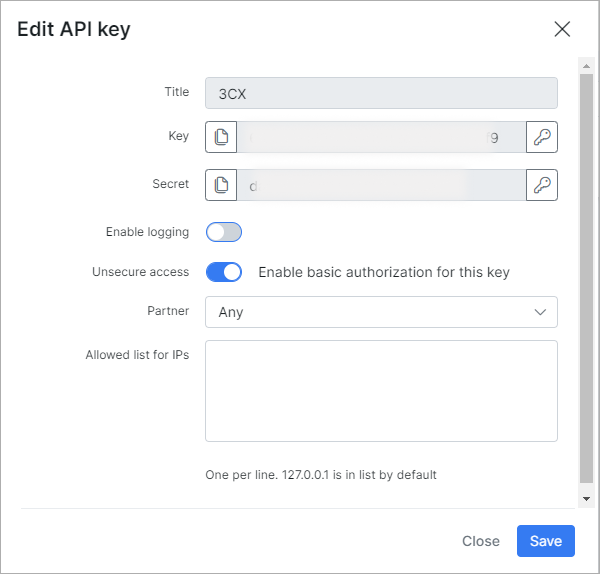
After installing the add-on, the API key and its secret will be created in Splynx (the Unsecure access option is enabled by default) with the following permissions:
| Customers |
|---|
| Customer: Add, View; Customer notes: Add |
| CRM |
|---|
| Leads: Add, View; Leads notes: Add |
XML Configuration File
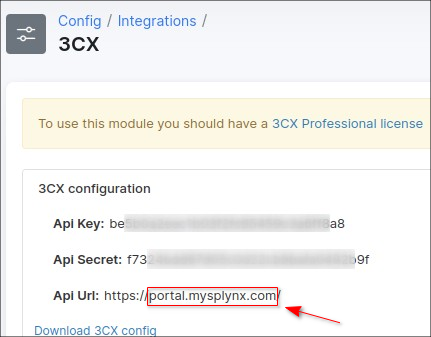
In Config → Integrations, you can find the 3CX section with the link to download the generated XML configuration file - splynx.xml.

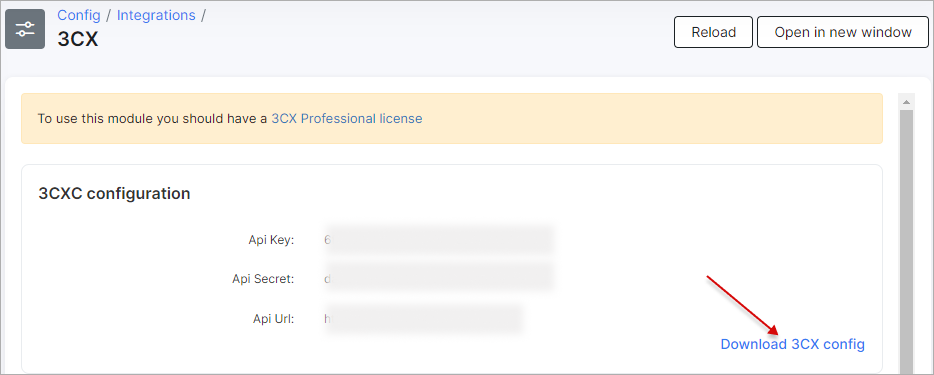
Save the output XML file on your local machine and do not edit it, it will be used for the CRM integration procedure. Note, to use the CRM integration module on 3CX server, you need to purchase the 3CX Professional level license.
3CX System Configuration
Let's perform the first time configuration of the 3CX system:
-
Sign up on the 3CX web page with preferred price choice
-
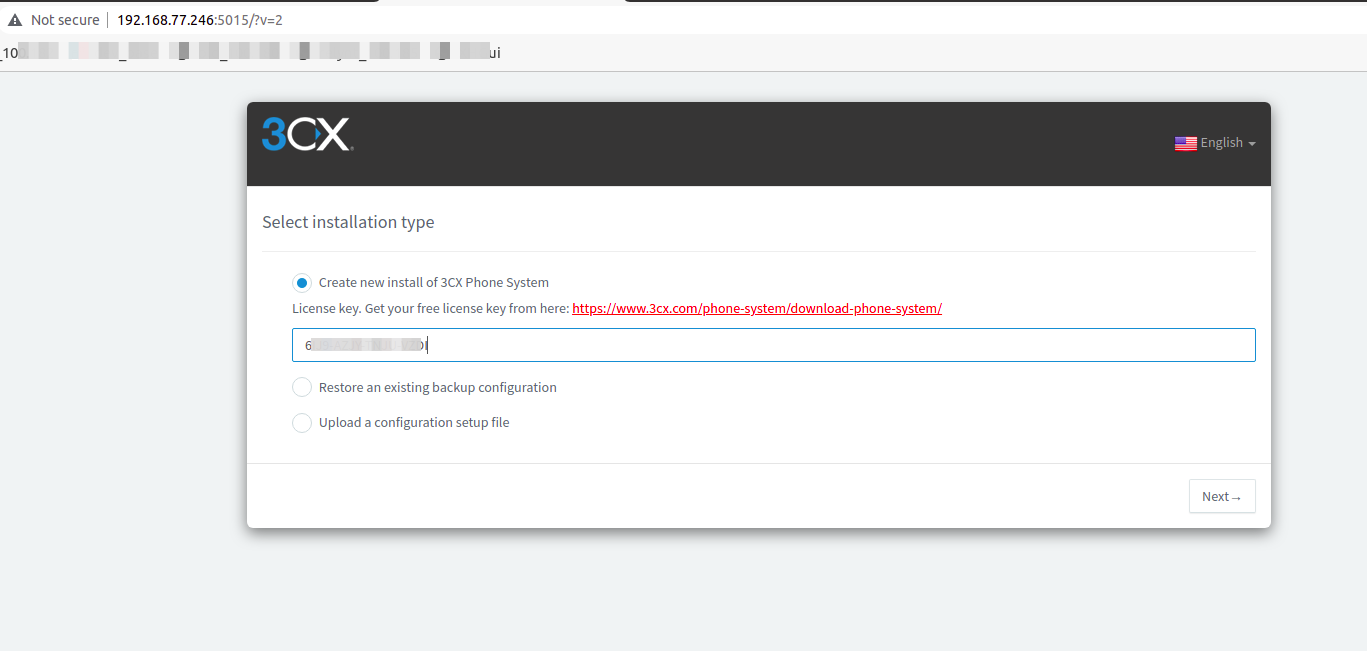
Choose the location for the 3CX system, write down your license key and follow the required installation steps. Open the IP of the machine 3CX is installed on followed by port
5015in a browser, e.g. https://IP_address:5015. The 3CX Web Configuration Tool guides you through important network and security settings.
Check the following links for more details:
- Installing 3CX using ISO (Debian)
- Installing 3CX on Windows
- Using Hyper-V to host your 3CX
- Hosting 3CX on Google Cloud
- Hosting 3CX on Amazon AWS
- Hosting 3CX on Amazon Lightsail
- Hosting 3CX on Microsoft Azure
- How to access for Self Hosted Instances via SSH

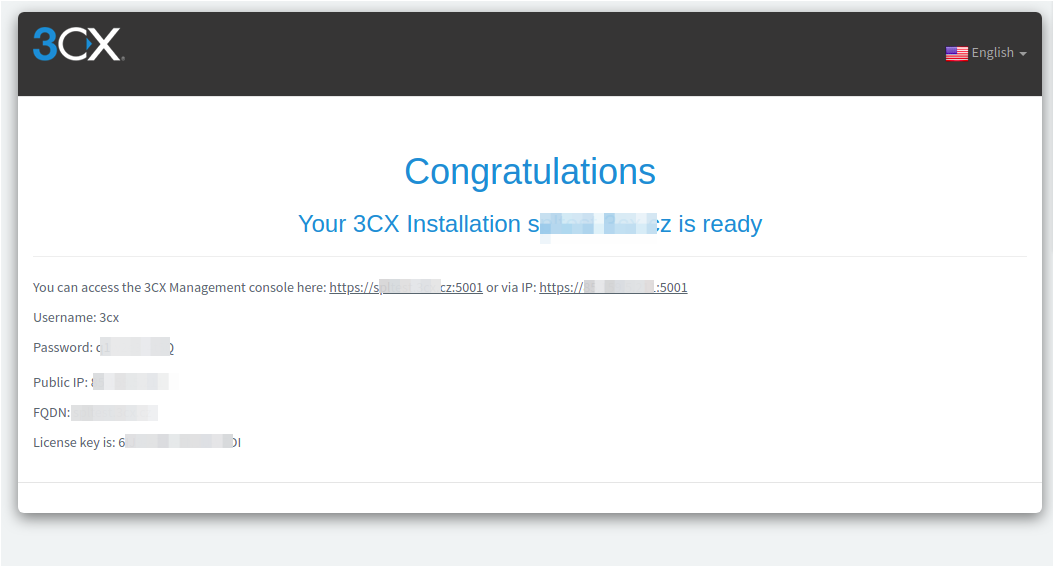
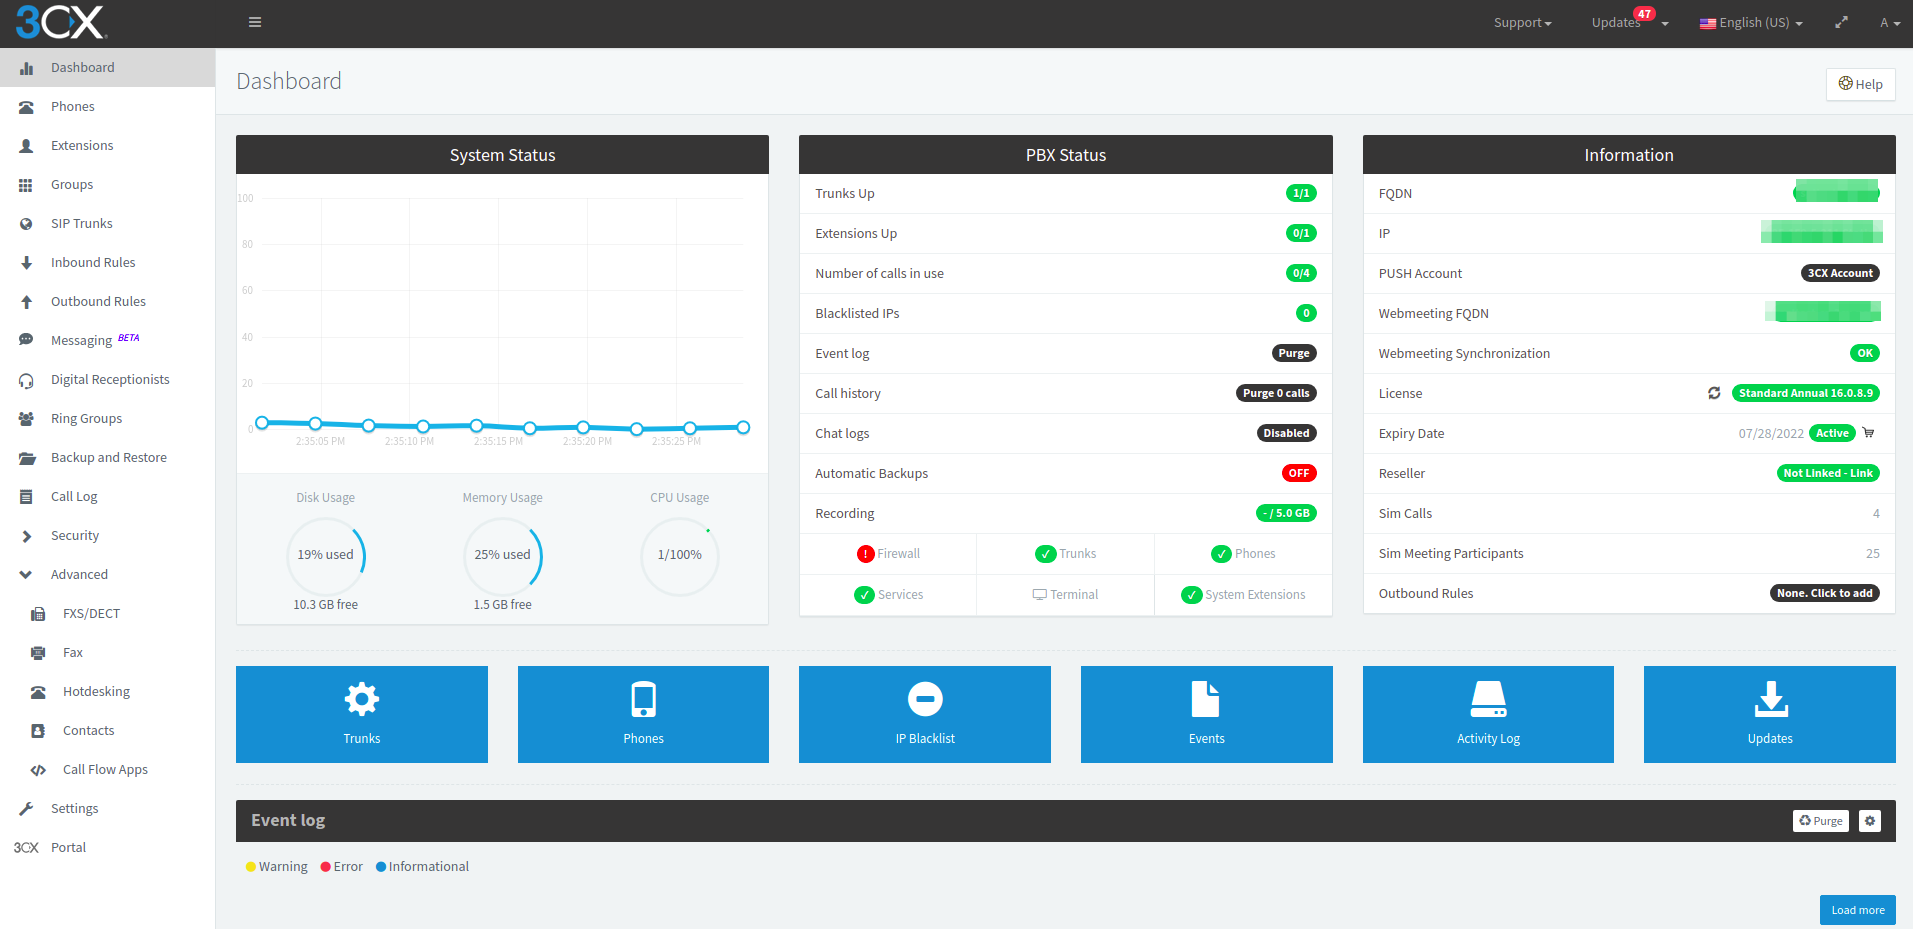
- Once the 3CX system installation has finished, open the 3CX Management console via https://your_domain/IP_address:5001
- In order to connect Splynx to the 3CX server, please execute one by one the commands which are listed in
Config → Integration → 3CXon the the server with 3CX system.
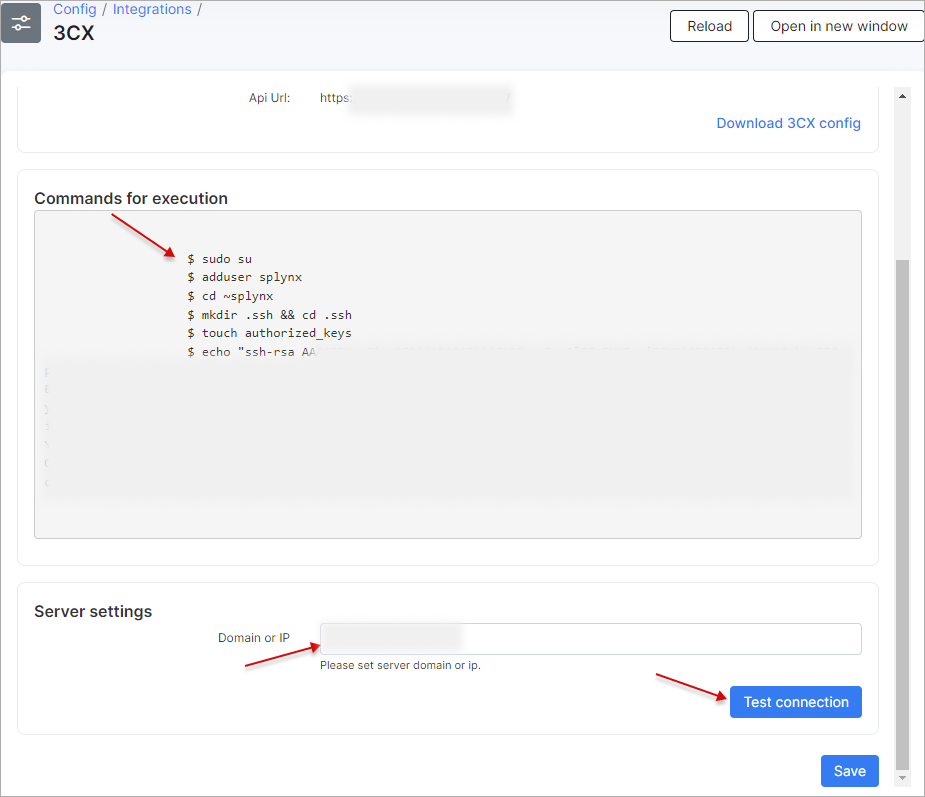
Example of commands
sudo su
adduser splynx
cd ~splynx
mkdir .ssh && cd .ssh
touch authorized_keys
echo "ssh-rsa rsa_key_value= splynx@base" >> "authorized_keys"
The permission and owner to .ssh folder should be the next drwxr-xr-x 2 root root 4096 Sep 15 08:40 .ssh.
Type the IP address or domain name of your 3CX system in Domain or IP field and press the Test Connection button to check the connection. Press Save button in order to save the entered IP address or domain name.
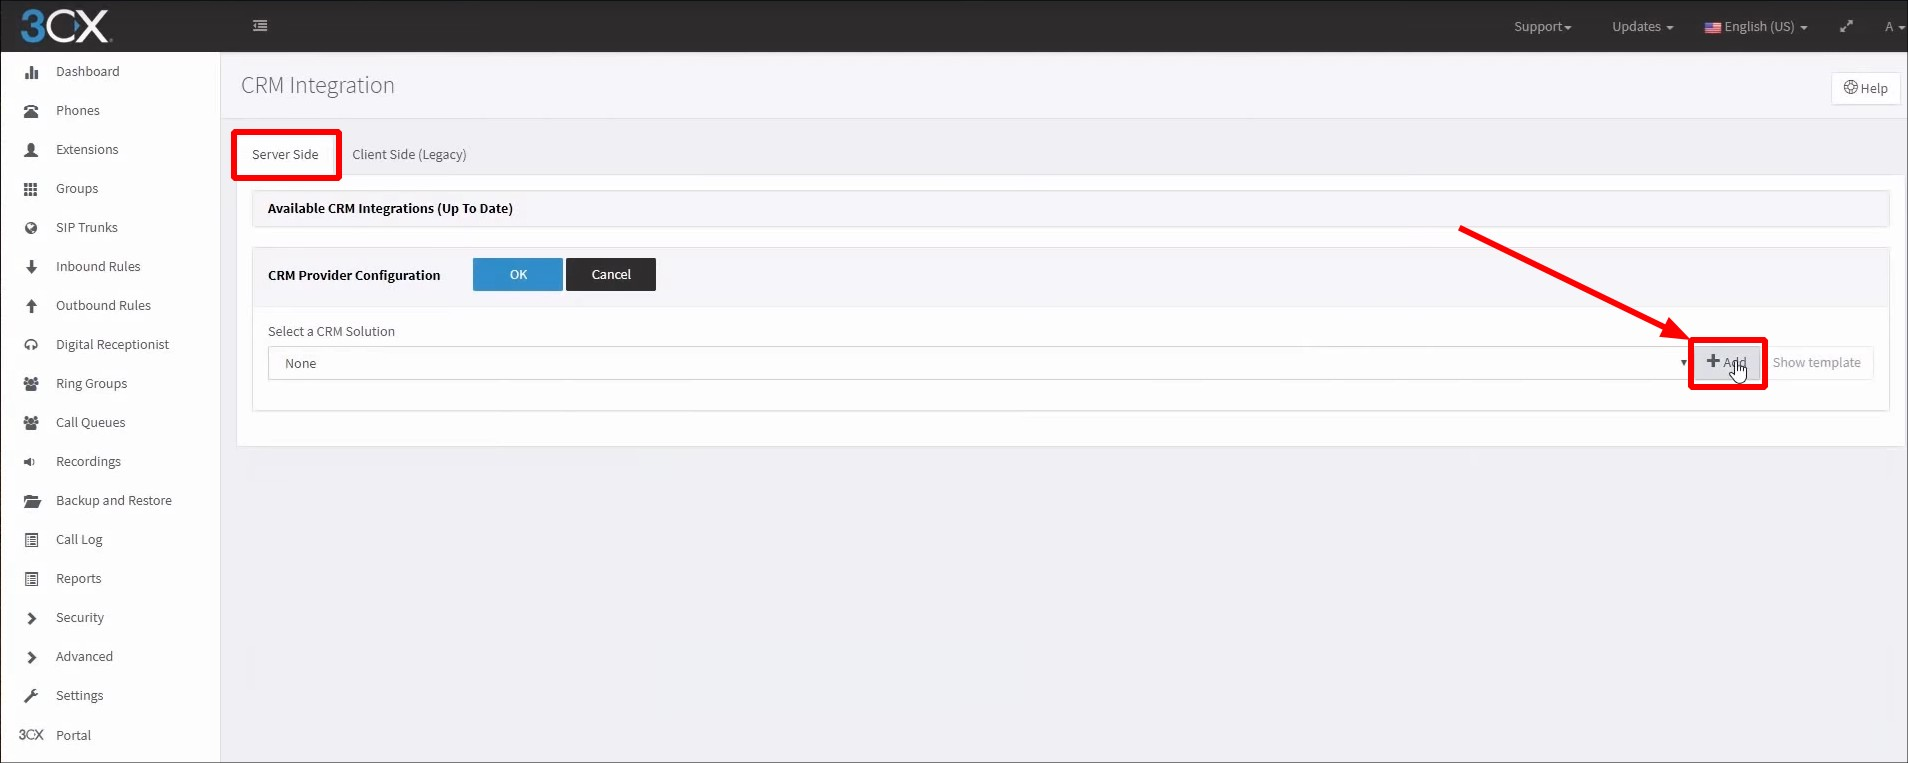
- To upload your XML file to 3CX system, navigate to 3CX
Management Console → Settings → CRMand choose the Server side tab.

- Click the Add button to upload your XML template file to 3CX:
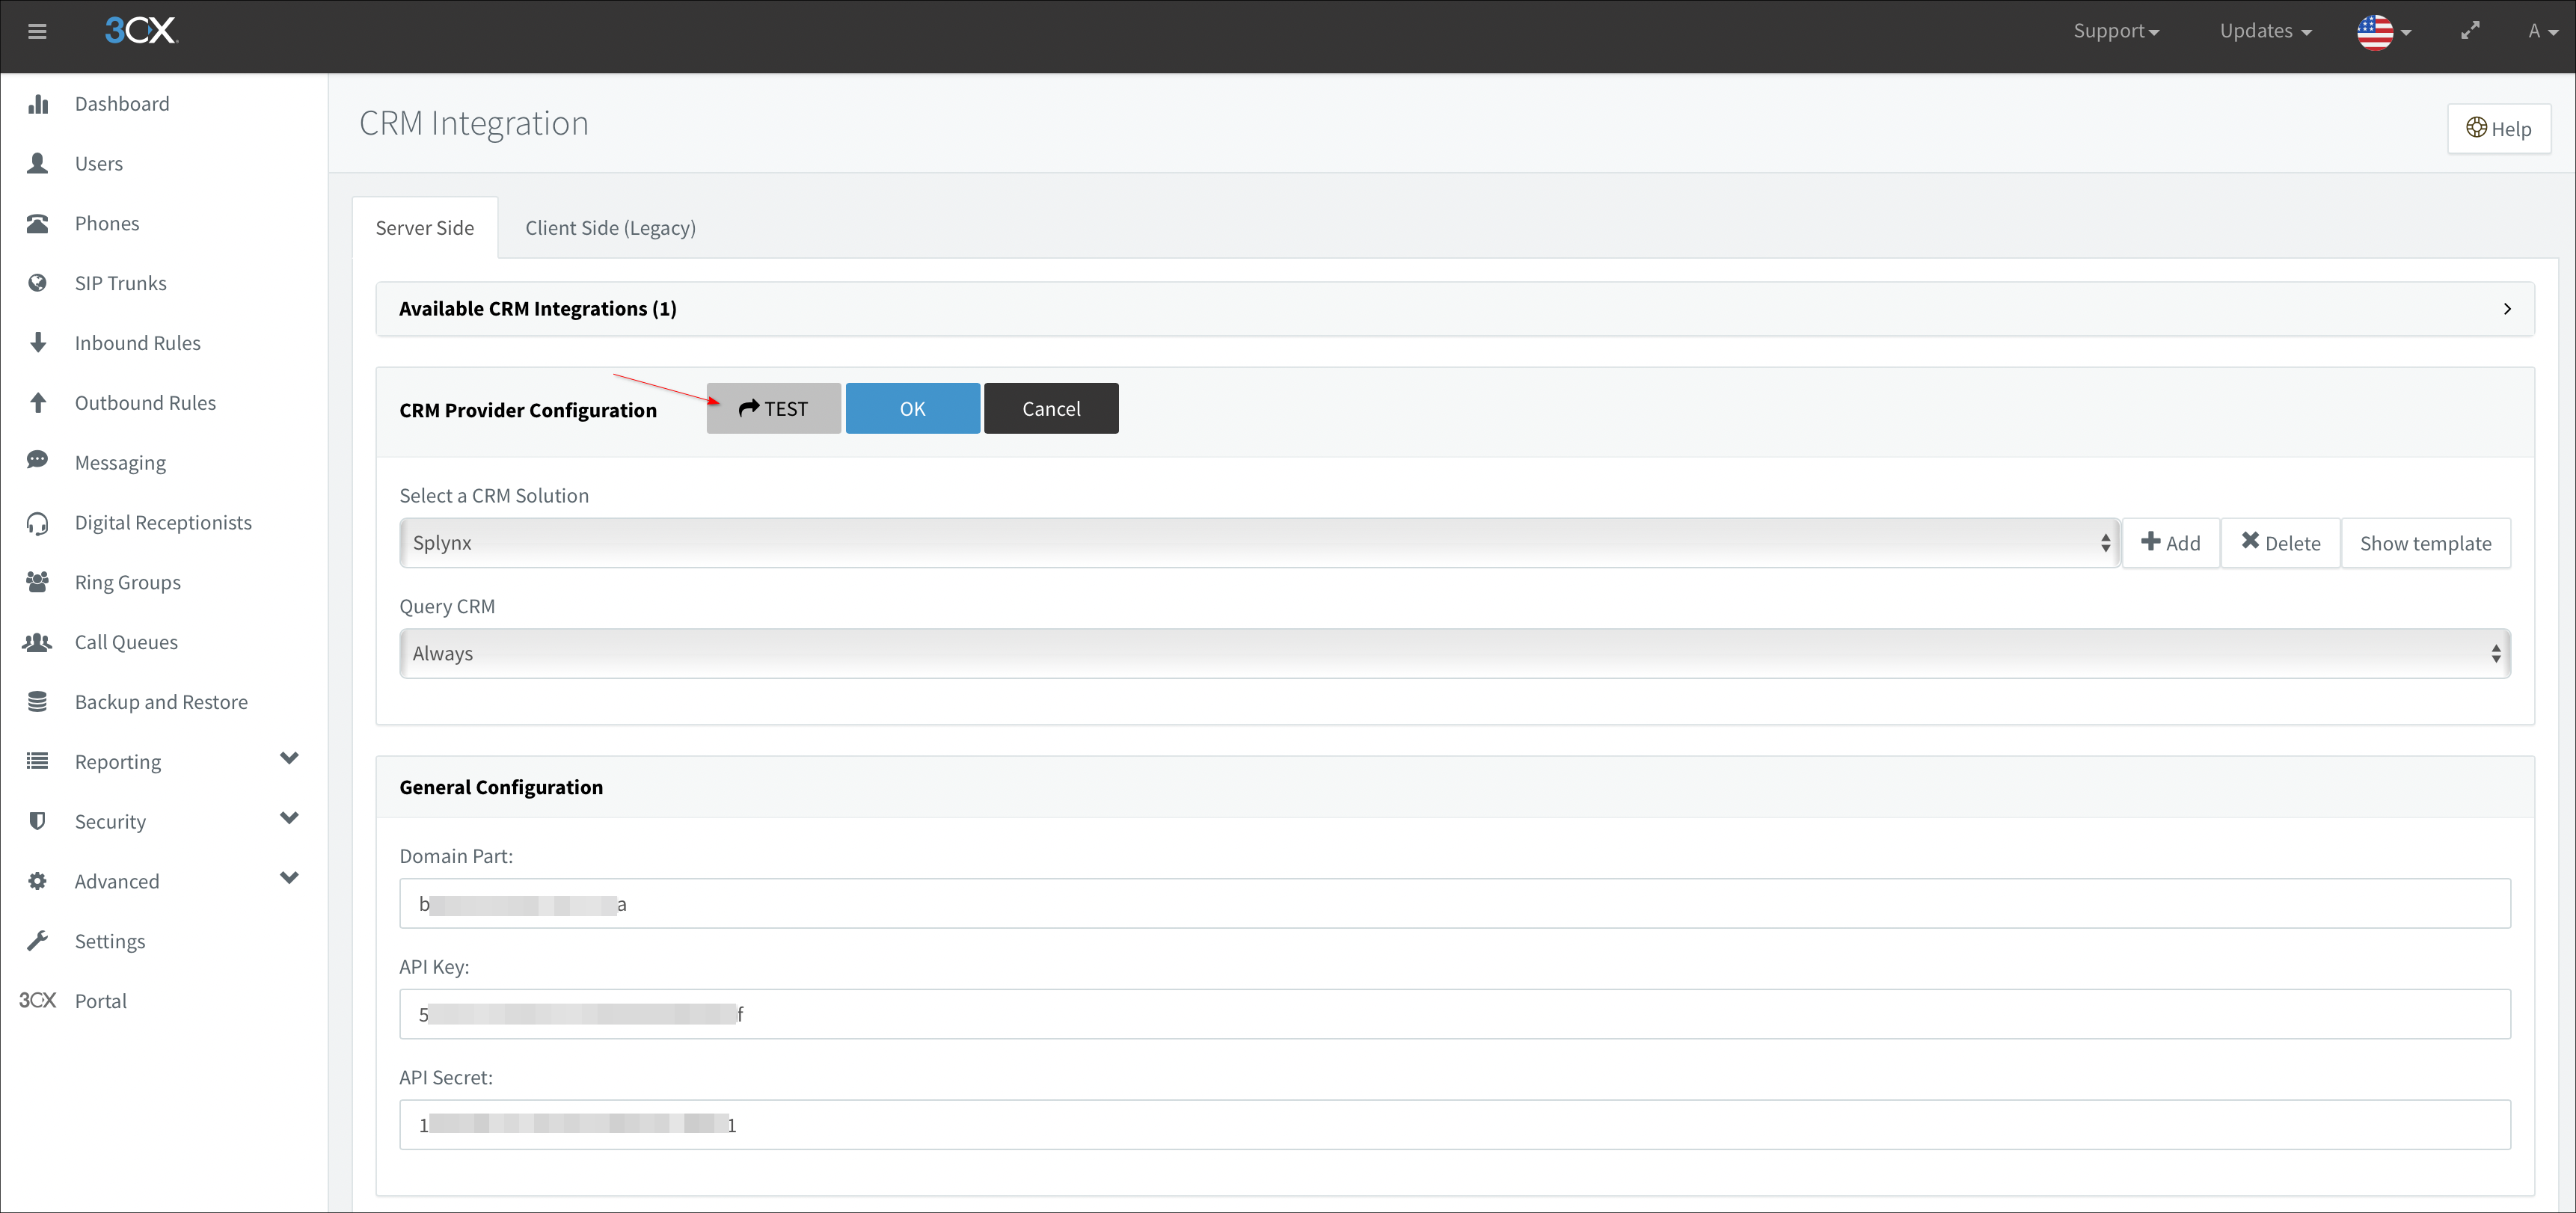
- After that, fill in the API Key/Secret/URL values in the required fields:
The Domain Part field should contain only the main domain address (without https//: | www., etc.), for example if we have the address https://www.portal.mysplynx.com/, only portal.mysplynx.com should be used.
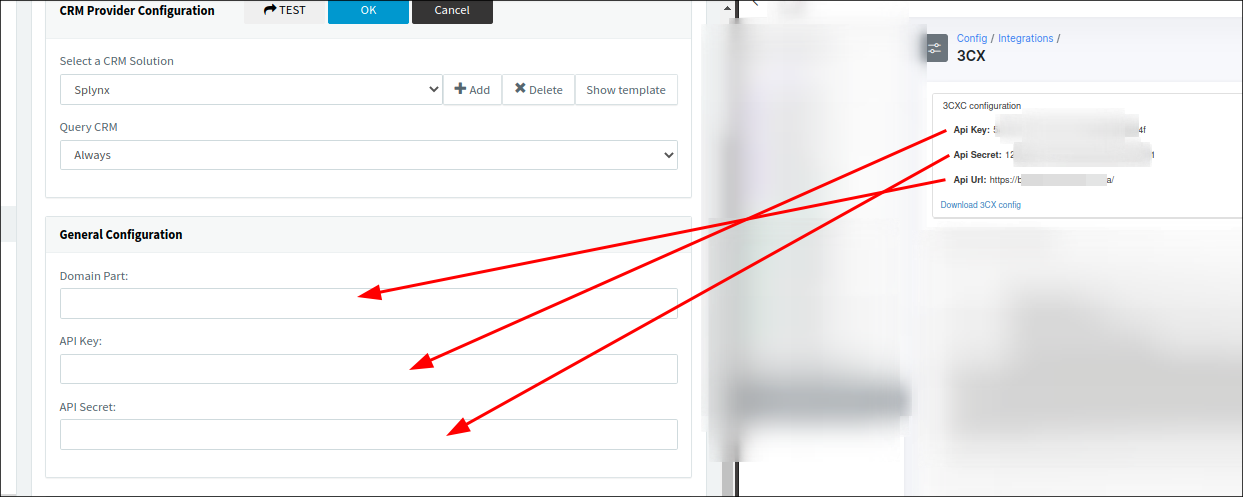
And press the Test button to check the CRM configuration.
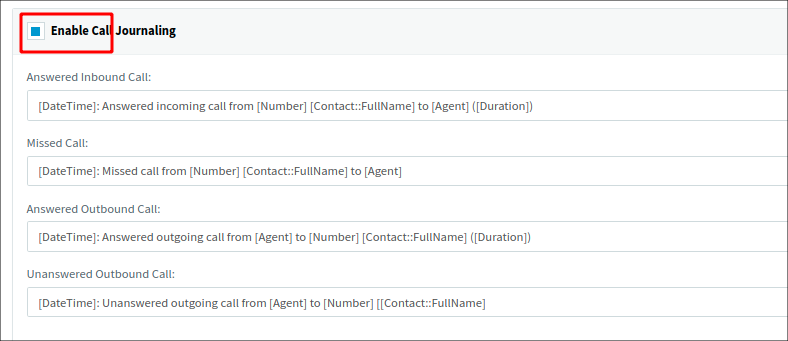
Then, scroll down and enable the Call Journaling:
If you want a new lead or customer in Splynx to be created automatically if someone calls from an unknown number - enable Contact creation in the template settings.
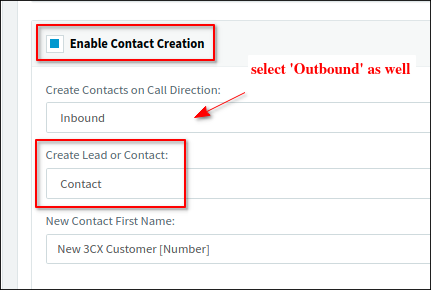
In the Create Lead or Contact field can be selected the following:
Contact- new customer will be created in Splynx;Lead- new Lead will be created in Splynx.
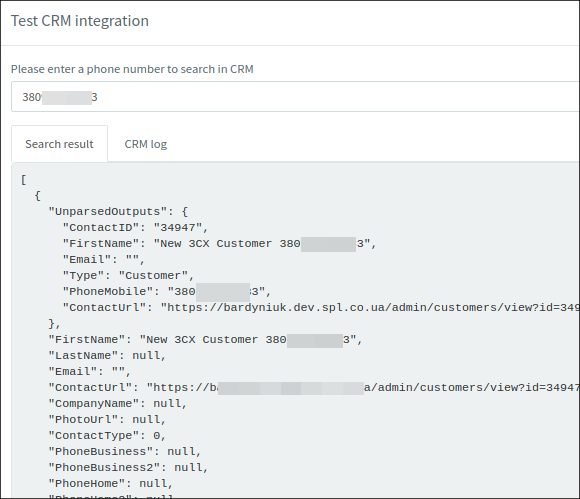
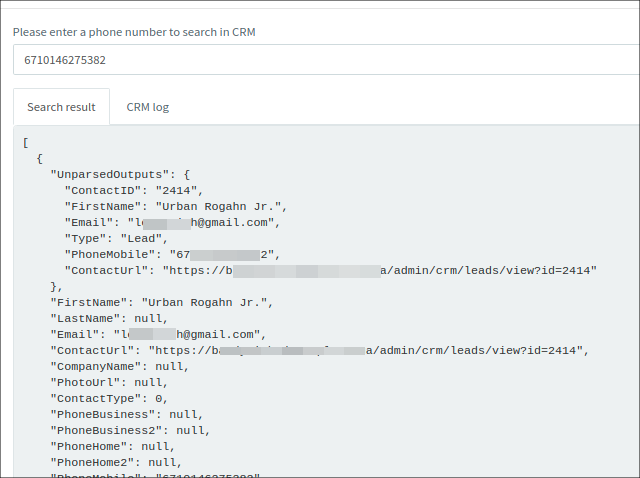
To check the creation of contacts, try dialing a number and click on the Contacts item on the sidebar and enter the phone number to search in CRM:
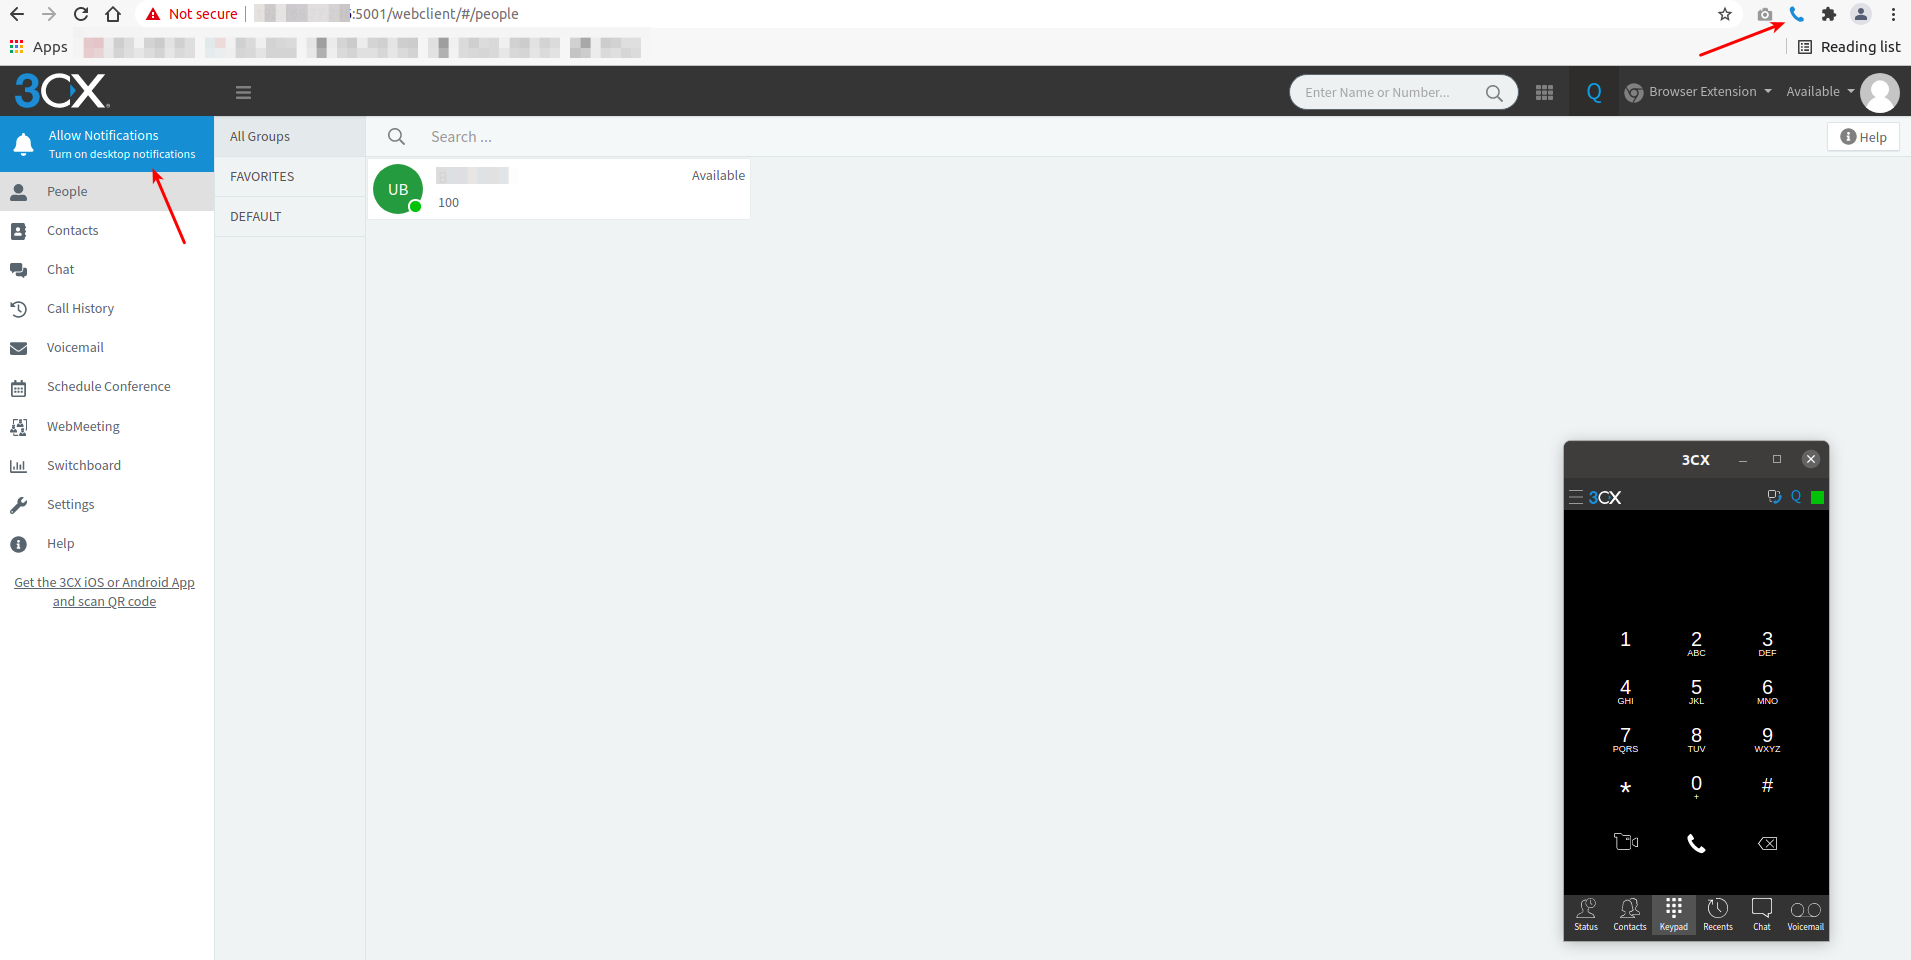
- Install iOS, Android or Windows app, navigate to your 3CX Web Client via https://your_domain/IP_address/webclient, log in using the extension number and password from your email letter and click on Activate your 3CX Browser Extension, in the top left-hand corner of the Web Client click Allow Notifications to enable desktop notifications, you will see the blue phone icon in the extensions bar in your browser. Click on the icon to open the Browser Extension pop out window. Now you can quickly and easily make and receive calls from your desktop without needing to open the full Web Client. Moreover, you can call to customers directly from Splynx.
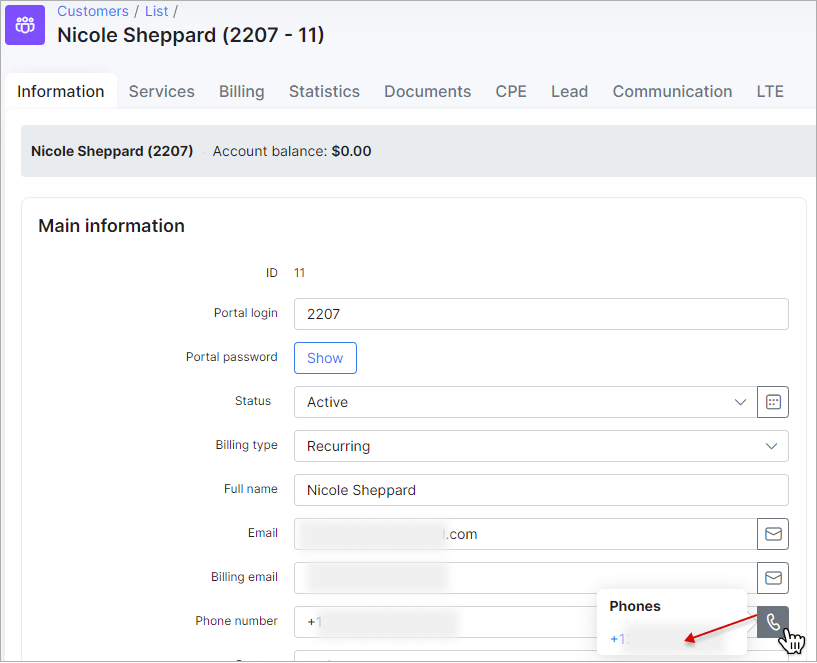
The calls history with its directions can be found in customer's profile, the Communications tab:

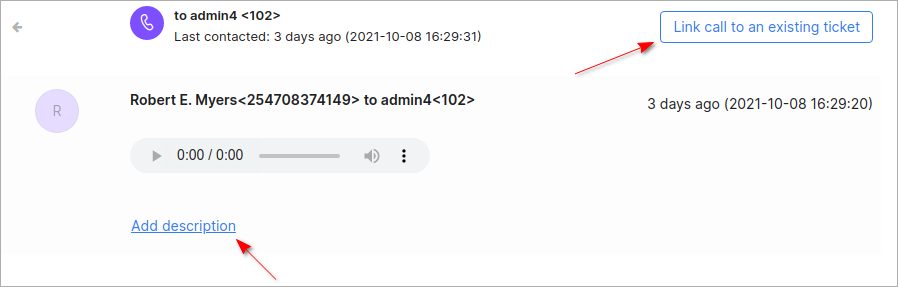
The player to listen the call will be visible if the add-on receives voice_file_url value. In case we use the 3d-party add-on that receives only recording_url, the link (Recording: ) to listen/download the file will appear instead.
To each call item in the list the description message can be added, the call can be link to the existing ticket in Splynx, if the ticket is closed, it will be reopened automatically.
Troubleshooting
Case 1: Calls are not recorded if a web browser with the 3CX extension is used to interact with a customer
Navigate to the 3CX server admin dashboard, click Settings and in the Recording Quota section disable the option Compress recordings to save space (ADPCM format 256Kb per minute instead of PCM format 1Mb per minute of recording):

The option Compression - enables to compress recordings in ADPCM format 256Kb to further conserve disk space.
Case 2: Delete contacts with an unknown number
If new contacts were created with unknown numbers and you want to delete them, navigate to Advanced → Contacts and click on the X button under the contact that you wish to delete from your 3cx system:
